How to Secure a Cat Carrier in a Car: 5 Easy Steps
Last Updated on September 12, 2025
How to Secure a Cat Carrier in a Car starts with the right carrier and a steady ride. An unsecured carrier can slide, tip, or become a projectile during a sudden stop. This guide shows safe back-seat placement, seatbelt threading, and LATCH anchor options. It also lists what to avoid, including front-seat airbags.
Readers get five easy steps with pro tips. They learn about hard-sided vs soft-sided crash protection, sizing and ventilation, and low-stress loading. It covers firm tie-down methods and simple checks. Quick fixes and emergency steps keep the cat safe and comfortable from driveway to destination.
Step 1 — Choose a carrier made for safe travel
Select a carrier built to reduce movement and protect the cat during sudden stops. Look for models that secure to a seatbelt or have dedicated anchor points. Choose materials that resist crushing and that meet airline-style or automotive safety recommendations. Test the carrier’s stability in the car before any long trip.
Compare hard-sided vs soft-sided options for crash protection
Hard-sided carriers offer stronger rigid protection against impacts and seat-to-floor shifting. They resist compression and keep the cat contained during collisions. Soft-sided carriers prove lighter and easier to store, but they can collapse under force. For road travel where safety is a priority, favor a sturdy hard-sided carrier or a soft carrier with reinforced panels and verified attachment points.
Pick the correct size, ventilation and visibility for your cat
Choose a carrier large enough for the cat to stand, turn and lie down comfortably. Ensure multiple vents for airflow on both sides and top. Solid visibility reduces anxiety for some cats; others prefer darker, covered sides. Match ventilation and sightlines to the cat’s temperament. For calming techniques during the trip, see practical tips at How to Calm Down a Cat in the Car.
Check door type and top-loading vs front-loading for easier handling
Front-loading doors work well for pulling a cat out in tight spaces and for seatbelt routing. Top-loading carriers ease placing a nervous or larger cat inside without forcing the cat backward. Inspect latches for secure locking and test them before each trip. If loading a fractious cat, choose a top or combination loading design to reduce stress and speed handling. Confirm the door orientation fits the car seat and restraint method.
Step 2 — Get the carrier and cat ready before you leave
The owner should prepare both carrier and cat well before the trip. A calm, familiar carrier reduces stress and prevents last-minute struggles. Prepare the carrier for comfort, add familiar scents, and build short, positive experiences inside the carrier so the cat accepts it as a safe space. Test any calming products at home first and consult a veterinarian for behavioral or medical concerns.
Clean, pad and scent the carrier for comfort
Empty the carrier and wash hard surfaces with a pet-safe cleaner. Dry thoroughly to prevent damp smells. Line the base with a low-profile, absorbent pad and a thin non‑skid mat to keep bedding from sliding. Add a folded blanket or an item of clothing carrying the owner’s scent. Secure latches and check vents for blockages. If the carrier has removable parts, lock them so nothing shifts during braking.
Build positive associations with treats, toys and short sits inside
Start several days before travel. Place treats, wet food, or a favorite toy just inside the carrier, then progressively farther in. Allow the cat to enter and exit freely at first. Reward calm behavior with treats and praise. Once the cat accepts sitting in the closed carrier, do short car sessions: engine off, then engine on, then brief drives. For extra guidance, see the tips on how to travel with a fussy feline.
Consider calming aids and when to consult your vet
Use pheromone sprays or wipes on carrier bedding about 10–15 minutes before placement. Try natural supplements or gentle wraps for anxious cats. Never give sedatives without veterinary approval. Consult the veterinarian if the cat shows extreme anxiety, aggression, or motion sickness. Schedule a pre-trip check if the cat needs a prescription calming plan. Test any remedy at home during the week before travel to confirm effectiveness and rule out side effects.
Step 3 — Place and load your cat into the carrier safely
Loading the cat into the carrier requires calm, quick movements and firm support. The goal is to minimize stress and prevent escapes while keeping the cat comfortable. Prepare bedding, a favorite toy, and treats before opening the carrier. Make sure hands are dry and free of strong scents.
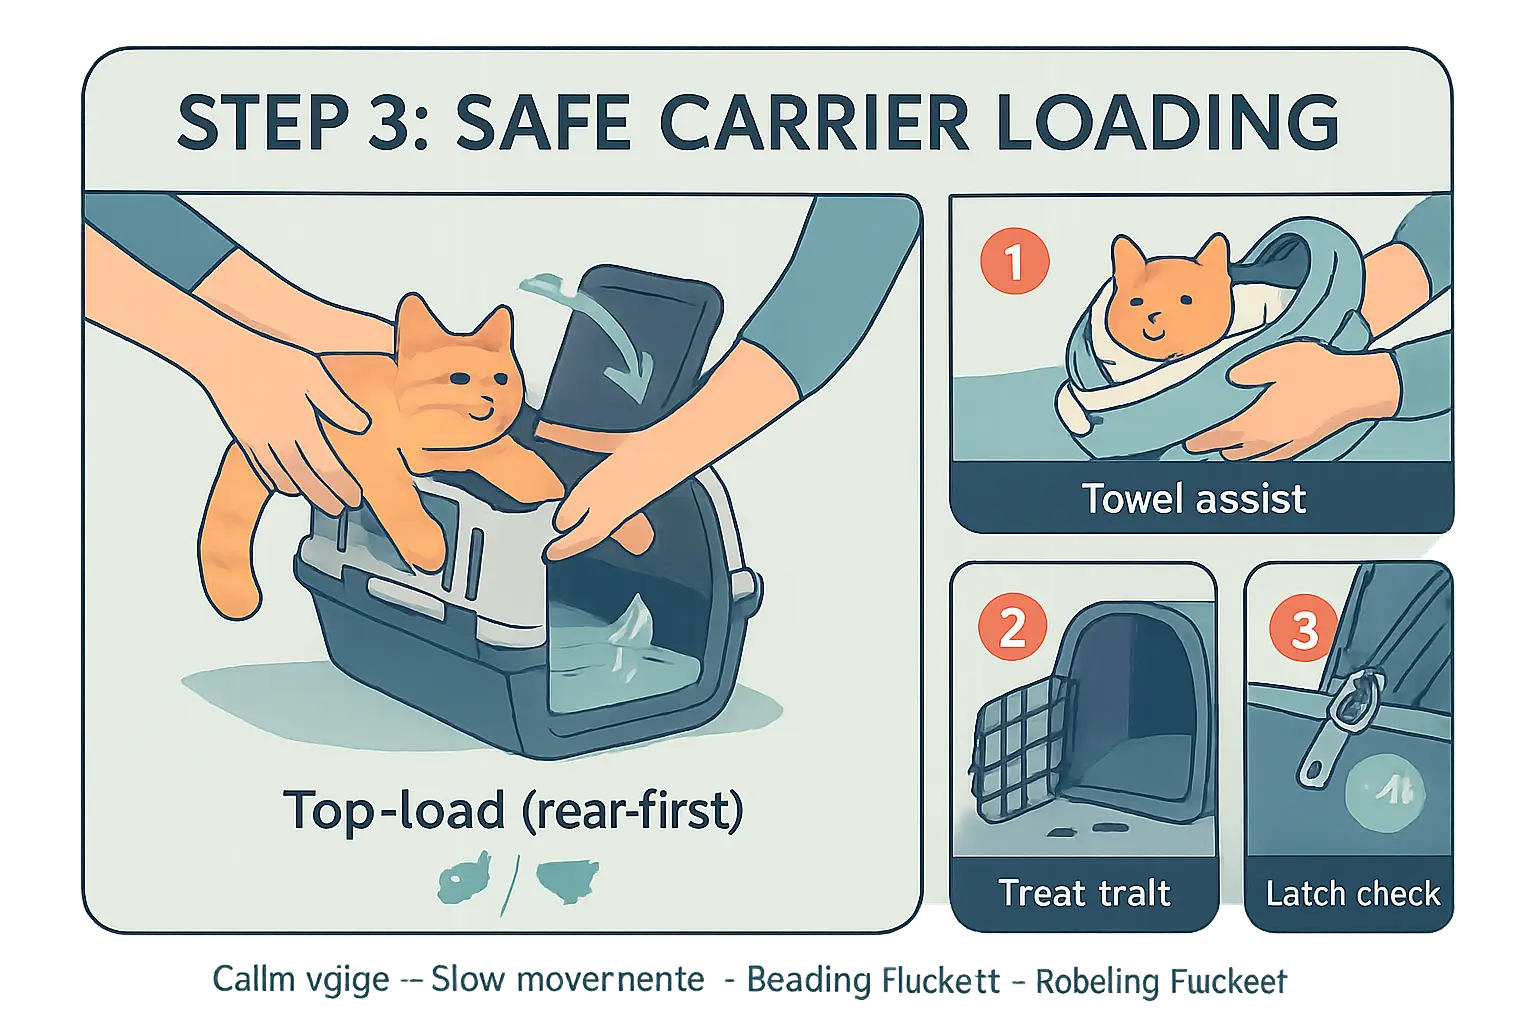
Gentle techniques: top-load, towel assist and low-stress handling
Top-loading works well for nervous cats. Open the top, gently slide one hand under the chest and the other under the hindquarters, then lower the cat in rear-first so it faces the exit. Use a soft towel to wrap a wriggling cat briefly; this controls claws and reduces panic. Employ low-stress handling: speak softly, move slowly, and allow the cat to sniff the carrier first. Consider applying a synthetic pheromone or a familiar-smelling blanket to the carrier to reduce anxiety. For extra tips on calming a cat before and during car travel see how to calm down a cat in the car.
Use treats and timing to avoid chasing or forcing
Use short, timed sessions rather than one long attempt. Offer high-value treats at the carrier entrance, then deeper inside. Place a small treat trail leading into the carrier to encourage voluntary entry. Try loading when the cat is naturally sleepy, such as after a meal or play session. Never chase or grab; that raises adrenaline and makes future loading harder. Reward calm behavior immediately so the cat learns the carrier equals positive outcomes.
Verify the door latches and zippers before moving the carrier
Check every latch, clip, and zipper for smooth operation before closing the door. Tug the door gently after latching to confirm it won’t slip under pressure. If the carrier uses zippers, loop a small carabiner or safety clip through the zipper pulls. With the cat inside, lift the carrier briefly to test the handle and latch security. Finally, tuck bedding so it won’t bunch under the cat and interfere with the door. Practice these checks at home until they become routine.
CTA: Practice loading and latch checks at home twice a week until the cat accepts the routine.
Step 4 — Secure the carrier inside the vehicle (5 reliable methods)
The goal is steady, immovable placement so the cat remains safe and calm. Use one primary restraint method and a secondary backup. After securing, perform a firm push test from multiple angles to confirm stability before driving.
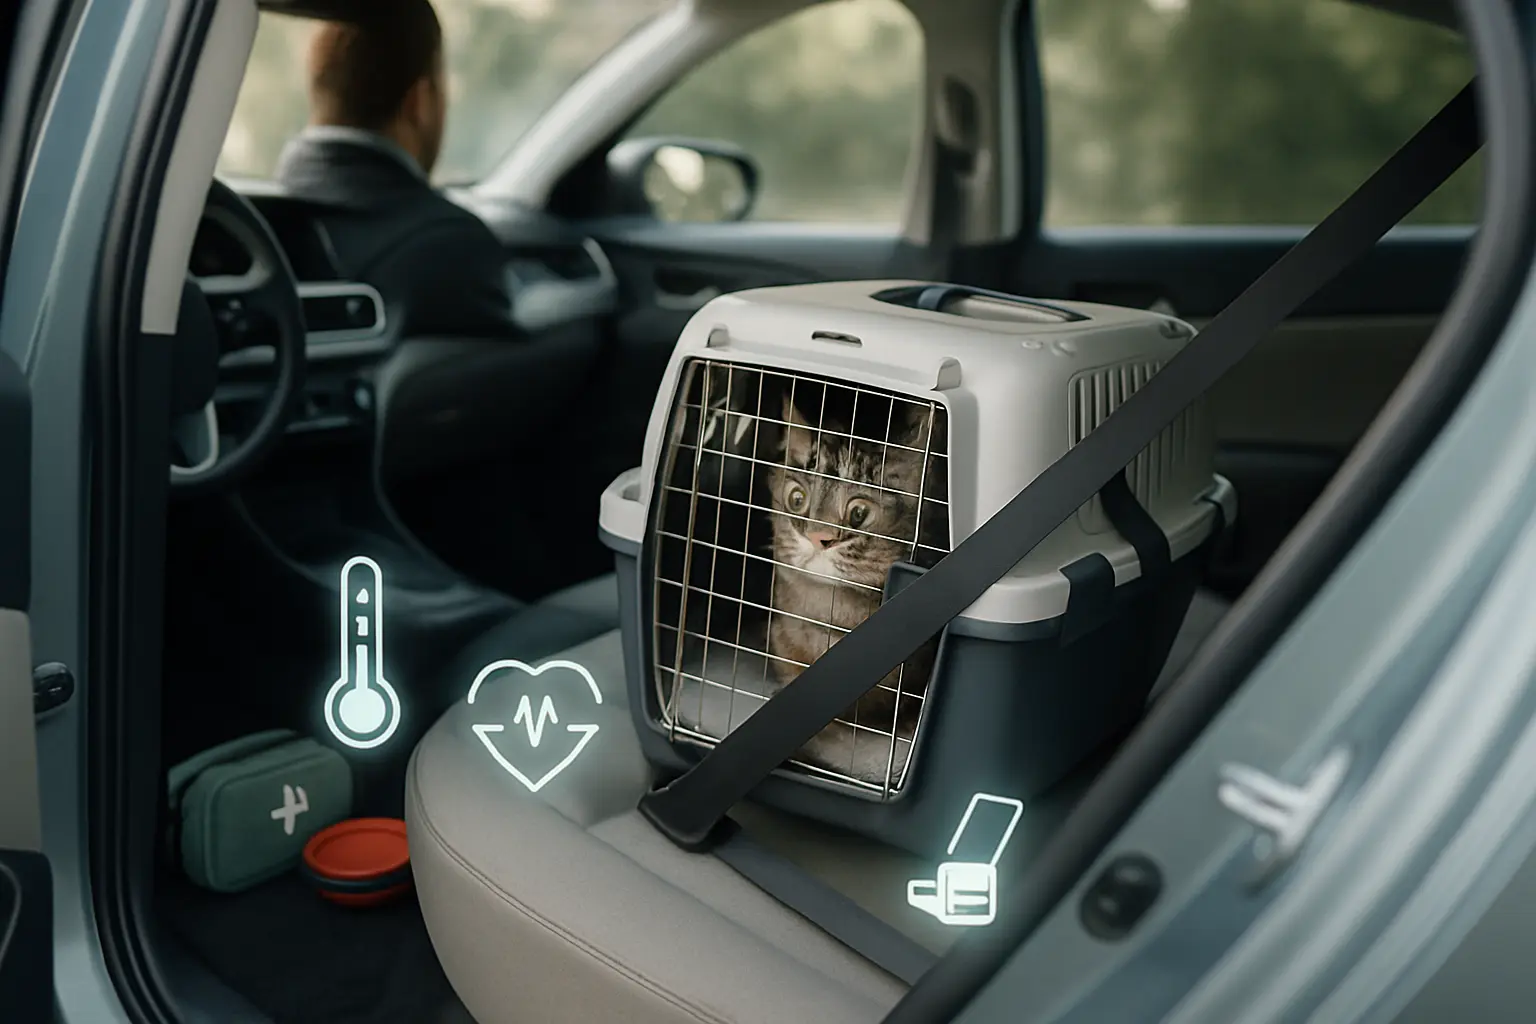
Seatbelt method: how to thread and fasten for stability
Thread the lap-and-shoulder belt through the carrier’s designated slots or around the hard-shell base. Buckle and pull the belt until it locks and the carrier sits snugly against the seat back. If the belt does not lock, engage the retractor by pulling it all the way out and re-tension. Place the carrier on the rear center or outboard seat, not the front. Add a short webbing strap or rolled towel to stop forward tilt.
LATCH or anchor strap options for carriers and crates
Use vehicle LATCH points or dedicated anchor bars with cam-buckle or ratchet straps for hard crates. Clip the crate’s anchor straps to lower LATCH anchors and tighten evenly on both sides. For higher security, run a strap across the crate’s width and secure to two separate anchors to prevent rotation. Verify the vehicle manual for anchor capacity before use.
Use a dedicated travel crate, cargo-area placement, or pet restraint as alternatives
Rigid travel crates with built-in tie-down points offer superior crash performance. In SUVs, mount the crate in the cargo area and attach it to the vehicle’s cargo anchors. A crash-tested pet harness that fastens to the seatbelt can work for cats that tolerate harnesses. For practical tips on anchoring crates and alternatives, see 5 ways to secure a dog crate in car.
What to avoid: front seat/airbag risks, loose placement, and unstable surfaces
Never place a carrier on the front seat. An airbag deployment can cause severe injury. Avoid placing carriers on folding or tilted seats, soft surfaces, or cargo covers that allow sliding. Do not rely solely on handles or straps that allow tipping. Final CTA: always perform a short, cautious drive and re-check straps before long trips.
Step 5 — Manage the trip: comfort, monitoring and emergency steps
How to Secure a Cat Carrier in a Car: 5 Easy Steps concludes by focusing on the actual journey. At this point, ensuring the carrier remains stable and the cat stays calm prevents most incidents. The driver or passenger should prioritize visibility, temperature control and minimal motion while keeping an emergency plan within reach.
Best placement for visibility, temperature control and motion reduction
Place the carrier where the cat can see a familiar person but stay protected from direct sunlight and drafts. The back seat, centered and secured with a seat belt, reduces forward-backward motion. If rear placement is impossible, secure it on the floor behind a passenger seat to limit sway. Use a folded towel beneath the carrier to dampen vibration. Keep windows cracked slightly if heat builds, or use the car’s climate control to maintain a steady, moderate temperature.
Monitor signs of stress or motion sickness and when to stop
Check the cat regularly for rapid breathing, drooling, constant vocalizing, pacing inside the carrier or excessive panting. Those signs indicate stress or motion sickness. If behavior escalates, stop in a safe area, open the carrier door slightly while keeping the cat restrained, and offer water. For techniques to calm an anxious cat before and during travel, see How to calm down a cat in the car.
Emergency extraction: how to open and remove your cat safely if needed
In emergencies, prioritize safety for people and the cat. Park, turn off the engine and engage the parking brake. Slide a towel over the carrier to reduce panic before unfastening straps. Open the carrier door facing away from traffic and coax the cat toward a secured, soft surface. If the cat resists, do not force removal; instead, call a veterinarian or animal control for guidance. Prepare a travel first-aid kit and keep emergency vet numbers accessible before every trip.
Practice and preparation for future trips
How to Secure a Cat Carrier in a Car: 5 Easy Steps begins with deliberate practice and preparation. Owners should treat travel readiness as a routine, not a last-minute scramble. Start by confirming the carrier fits the chosen vehicle seat and that the seatbelt path or anchor points will hold it firmly.
Assemble an emergency kit: bottled water, a small bowl, a spare leash and harness, a folded towel, absorbent pads, and any medications. Run through a mock setup at home: place the carrier in the planned seat, fasten it using the seatbelt or anchors, and check for wobble. Replace slippery liners with a non-slip mat to reduce sliding.
Gradually introduce travel gear during normal days. Leave the carrier out with familiar bedding and toys. Short, calm exposure lowers stress and creates predictable expectations for future trips. For broader strategies on making travel comfortable for anxious cats, see how to travel with a fussy feline.
Short practice drives to acclimate your cat and test securement
Take several short drives before attempting longer trips. Begin with the engine off while the cat explores the carrier in the parked car. Next, run the engine with the carrier inside. Progress to 5–10 minute drives on quiet streets.
During each drive, test the carrier securement. Perform slow stops and gentle turns and then park to inspect carrier movement. If the carrier shifts, adjust the seatbelt routing, add a non-slip pad, or use a luggage strap through the carrier handle. Check that doors and latches remain locked under motion.
Keep sessions short and reward calm behavior immediately after the drive. Repeating these short exposures lets the cat form positive associations and proves the chosen securement method works under real conditions. Additional guidance for calming a cat in the car appears at how to calm down a cat in the car.
Create a travel checklist and routine to reduce last-minute stress
A concise checklist reduces forgotten items and last-minute anxiety. Include carrier, correct bedding, harness and leash, litter box or pad, food, water, medications, calming pheromone spray, and waste bags. Add the car-specific items: spare seatbelt clip, non-slip mat, and a luggage strap.
Establish a consistent pre-trip routine: a light meal a few hours before departure, a supervised litter break, a short play session, and placing the cat in the carrier with a favorite treat five to ten minutes before leaving. Post the checklist near the keys or glove box and use it each trip.
Regular routines make the carrier and car predictable for the cat. For insights on adapting travel routines to confined spaces and longer journeys, consult the practical tips at traveling with cats in an RV. CTA: print the checklist and tape it inside the carrier for quick reference.
Training tips to make carrier entry and car rides predictable
Train entry to the carrier in short, frequent sessions. Leave the carrier door open at home and place high-value treats or catnip inside. Reward the cat for entering voluntarily. Gradually increase the time the cat spends inside with the door closed for brief intervals.
Pair a consistent verbal cue, such as “carrier,” with treats. Use a harness and leash for safe handling when moving the cat to the car. Practice fastening the carrier in the vehicle while the cat sits quietly inside, then reward calm behavior after brief drives.
Desensitize the cat to travel sounds. Play low-volume engine and road noise during training sessions. Avoid forcing the cat into the carrier—force creates resistance. For containment and escape-prevention strategies applicable to mobile spaces, review how to keep cats from escaping an RV.
Troubleshooting common problems and quick fixes
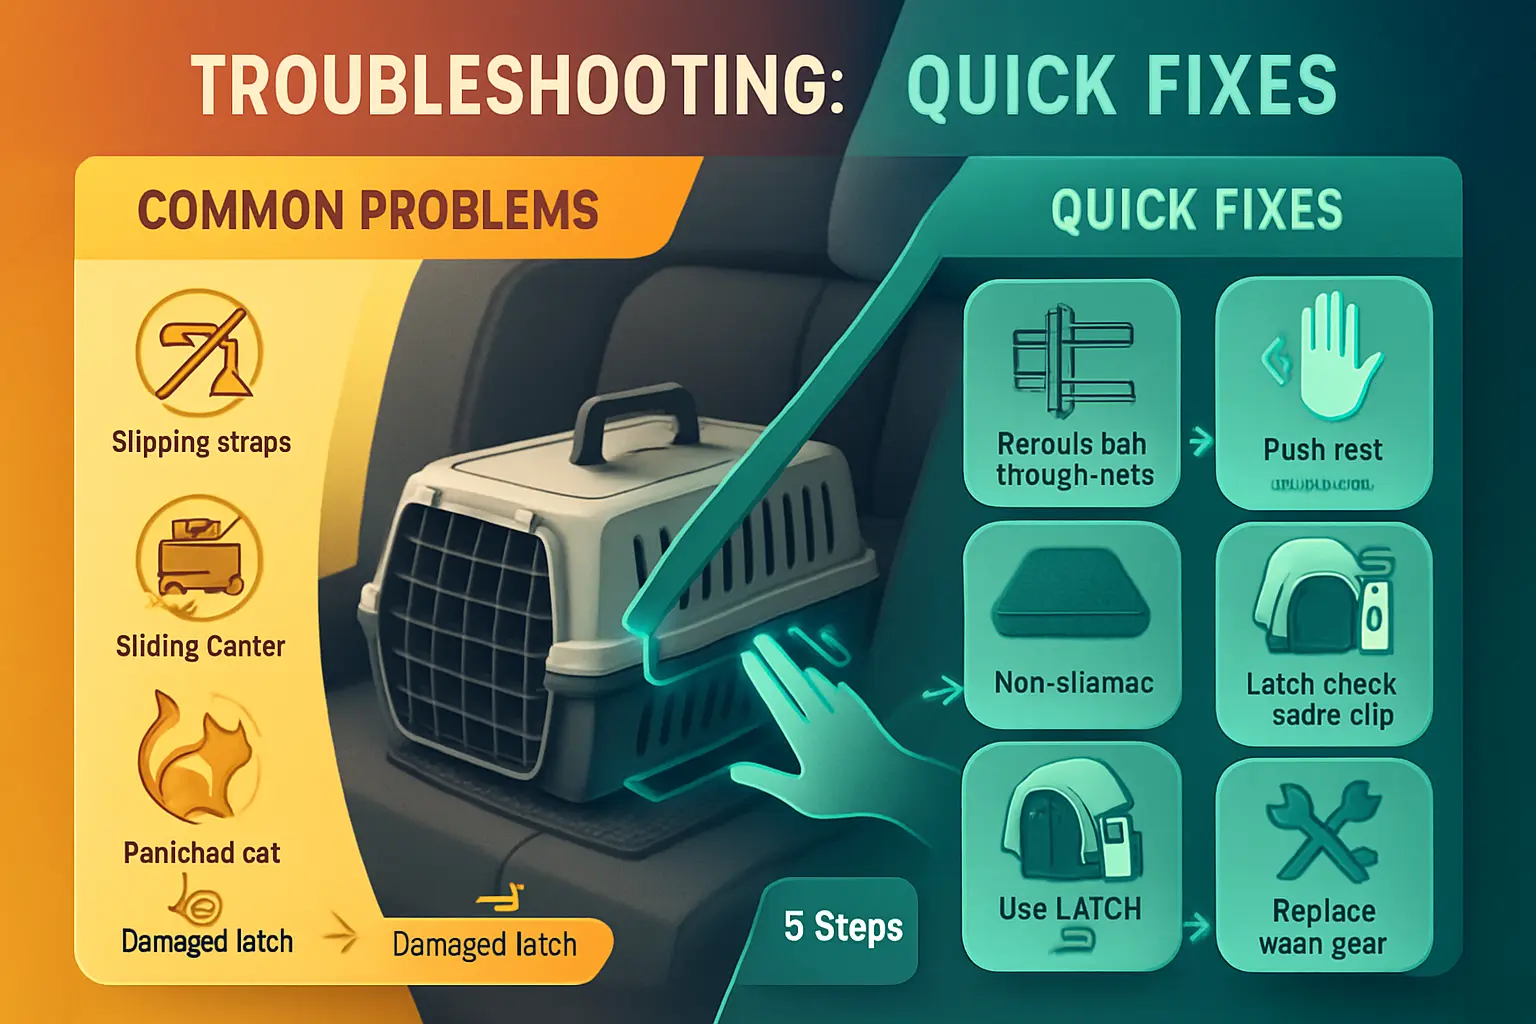
Securing a cat carrier sometimes still produces problems: slipping straps, a noisy or panicked cat, or a carrier that won’t fit the seat correctly. Owners should diagnose each issue quickly and use targeted fixes. First, confirm the seatbelt or tether routes through the carrier’s designated slots. Second, test stability by pushing the carrier gently; any significant movement requires re-routing or adding a non-slip mat. Third, check the carrier’s latches, hinges, and ventilation for damage before the next trip.
If your cat escapes the carrier: safe recapture strategies
If a cat exits the carrier inside a car, the priority stays safety. Pull over in a safe place and turn off the engine. Close all doors and windows except one that opens to the outside for a quick exit path. Move calmly and speak softly to avoid further spooking. Use a towel or light blanket to cover the cat briefly; this reduces visual stimuli and makes handling easier. Offer a favorite treat or toy to lure the cat back. If the cat hides under a seat, avoid reaching blindly—use a flashlight and coaxing. For tips on reducing panic during travel, consult the guide on how to calm down a cat in the car.
Handling aggressive or panicked cats and when to seek professional help
Aggression often comes from fear. Owners should avoid direct face contact and rapid movements. Covering the carrier with a breathable blanket calms many cats. Pheromone sprays applied to carrier bedding before travel reduce stress for some animals. If a cat repeatedly injures itself or others, stop travel and contact a veterinarian. The vet can advise medical checks or prescribe short-term anti-anxiety medication. Consider a certified animal behaviorist for chronic fear or aggression that training cannot resolve.
Cleaning, maintenance and replacing worn carriers
Regular cleaning and inspection extend carrier life and maintain safety. Remove all bedding and wash it according to label directions. Clean hard surfaces with a mild, pet-safe detergent and rinse thoroughly. Inspect plastic shells and metal doors for cracks, rust, or loose screws. Replace any carrier with structural damage, frayed straps, warped locking mechanisms, or compromised ventilation. A replacement also makes sense if the cat outgrows the carrier or if the carrier no longer meets airline or veterinary requirements. Keep a small repair kit in the car: spare screws, zip ties, and a compact non-slip mat for emergency stabilization.
Summary
How to Secure a Cat Carrier in a Car: 5 Easy Steps walks through choosing the right travel-safe carrier, preparing the cat and setup, loading with low-stress handling, locking the carrier down with reliable restraints, and managing comfort and emergencies on the road. The focus stays on stability, proper placement, and calm handling so the cat travels safely and quietly.
By testing fit and fasten points beforehand, practicing short drives, and using a simple checklist, owners can turn travel into a predictable routine. A firm “push test,” correct seatbelt or anchor routing, and ongoing monitoring of temperature and stress complete a safer, smoother trip.
Key Takeaways
- Choose a travel-safe carrier: Prefer hard-sided or reinforced soft models with designated seatbelt slots or anchor points and secure latches.
- Prep for comfort and calm: Clean, pad with non-slip bedding, add familiar scent, and build positive associations with short, rewarding sessions.
- Load with low-stress handling: Use top-loading, a towel assist, and quiet movements; confirm every latch and zipper before lifting.
- Secure on the rear seat: Route the seatbelt through the carrier’s slots and lock it tight; or use LATCH/anchor straps or a rigid travel crate. Add a backup strap and perform a firm push test.
- Avoid high-risk setups: Never use the front seat or unstable surfaces; control temperature and limit motion and glare.
- Monitor and plan for emergencies: Watch for stress or motion sickness, stop if needed, and keep a basic travel kit and vet contacts on hand.
FAQ
-
What type of carrier is safest for car travel?
A sturdy hard-sided carrier with seatbelt slots or a reinforced soft carrier with verified anchor points offers the best protection. Ensure it resists compression and locks securely.
-
How should a seatbelt be routed through the carrier?
Thread the lap-and-shoulder belt through the carrier’s designated slots or around the hard base, then pull until the retractor locks. Place it on the rear seat, snug against the seatback, and add a short strap or towel to prevent tilt.
-
Why is the front seat a poor choice for a cat carrier?
Passenger airbags can cause severe injury on deployment. The rear seat provides safer placement and reduces forward motion during braking.
-
How can a cat be kept calm during the drive?
Use familiar bedding, pheromone spray applied 10–15 minutes before loading, partial covering to reduce visual stimuli, and gradual acclimation with short practice drives. Consult a vet before using any medication.
-
What should be done if the carrier shifts while driving?
Pull over safely, re-route the belt through the correct slots, tighten until locked, and add a non-slip mat or secondary strap. If movement persists, use LATCH anchors or a rigid travel crate with tie-down points.