5 Ways to Secure a Dog Crate in a Car for Safe Travel
Last Updated on October 27, 2025
A loose crate can become a dangerous projectile during a sudden stop. Securing it reduces injury risk and driver distraction. It also keeps travel compliant with pet restraint and unsecured-load laws. Treat the crate like heavy cargo anchored to the car.
In 5 Ways to Secure a Dog Crate in a Car for Safe Travel, drivers learn proven, vehicle-ready methods. They learn when to use seat belts, LATCH anchors, ratchet straps, cargo nets, and crash-tested systems. The guide outlines safe crate locations, a pre-drive checklist, and a fast stability test. With the right setup, errands and road trips stay safer and less stressful.
Why securing a dog crate matters for safety and legal reasons
A properly secured crate keeps a dog stable and reduces injury risk during normal driving and collisions. Securing the crate also protects vehicle occupants from a loose, heavy object. Drivers should treat a crate like any other cargo and secure it to the vehicle structure. Failure to do so raises safety and legal concerns.
Key safety risks in an unsecured crate (crash forces, sudden stops, escapes)
Unsecured crates can slide, tip, or become projectiles during sudden stops or crashes. Crash forces multiply a dog’s weight, increasing blunt-force risk. A shifted crate can let a dog escape into the cabin, distracting the driver. Even low-speed collisions can cause severe injury if the crate fails.
How securing a crate protects passengers, the dog, and vehicle occupants
Tightly anchored crates limit movement and absorb impact energy. That containment reduces dog injury and prevents the crate from striking passengers. Restraining systems that attach to seat anchors or the vehicle frame share load across strong points. Proper placement—behind seats or in the cargo area—keeps sightlines clear and minimizes distraction. For practical methods to fasten crates and other secure-dog solutions, see how to secure a dog in the cargo area of SUV.
Relevant laws and common regulations to be aware of
Laws vary by state and country but commonly prohibit distracted driving caused by loose animals. Some jurisdictions treat an unsecured animal as an unsecured load. Commercial carriers and some states require animals to be restrained during transport. Drivers should check local statutes and follow vehicle manufacturer guidance. When unsure, secure the crate to seat anchors or use certified restraint hardware and consult local regulations before travel.
Pick the right crate and get your car ready
Choosing a crate and preparing the vehicle reduces injury risk and keeps the dog calm. Owners should match crate size, strength, and safety features to the dog’s weight and travel habits. Confirm the vehicle has stable anchor points and a clear cargo area before loading a crate.
For model comparisons and recommendations, consult a dedicated review of options like the best dog crates for car travel in 2023 — a comprehensive review.
Choosing size, strength, and crash-tested features
Measure the dog standing and lying down to select a crate with at least a few extra inches of headroom and length. Heavy, rigid crates with metal frames give better protection in sudden stops. When available, choose crates with crash-tested ratings or manufacturer crash data. Verify weight limits and construction materials; welded steel or aircraft-grade aluminum transfer force away from the dog better than thin plastic.
Preparing the crate (padding, doors, latches, ventilation)
Line the crate with a low-profile, non-slip pad that stays flat under force. Avoid loose bedding that can shift and obstruct breathing. Test door latches and hinges before each trip; replace worn fasteners. Ensure ventilation on all sides and a secure but visible door that allows monitoring. Add a tether inside only if it cannot entangle the dog.
Preparing the vehicle (anchor points, cargo area clearance, removing loose items)
Inspect the vehicle for built-in tether anchors or seat anchors rated for cargo. Use seat-belt straps, cargo tie-downs, or ratchet straps to secure the crate to more than one point. Clear the cargo area of grocery bags, tools, and loose objects that can become projectiles. Position the crate on a flat surface, against the vehicle seat or wall, and test for movement by pushing the crate firmly in all directions.
CTA: Check crate fit, hardware, and anchor security before every journey to protect the dog and passengers.
Five effective ways to anchor a dog crate in a car
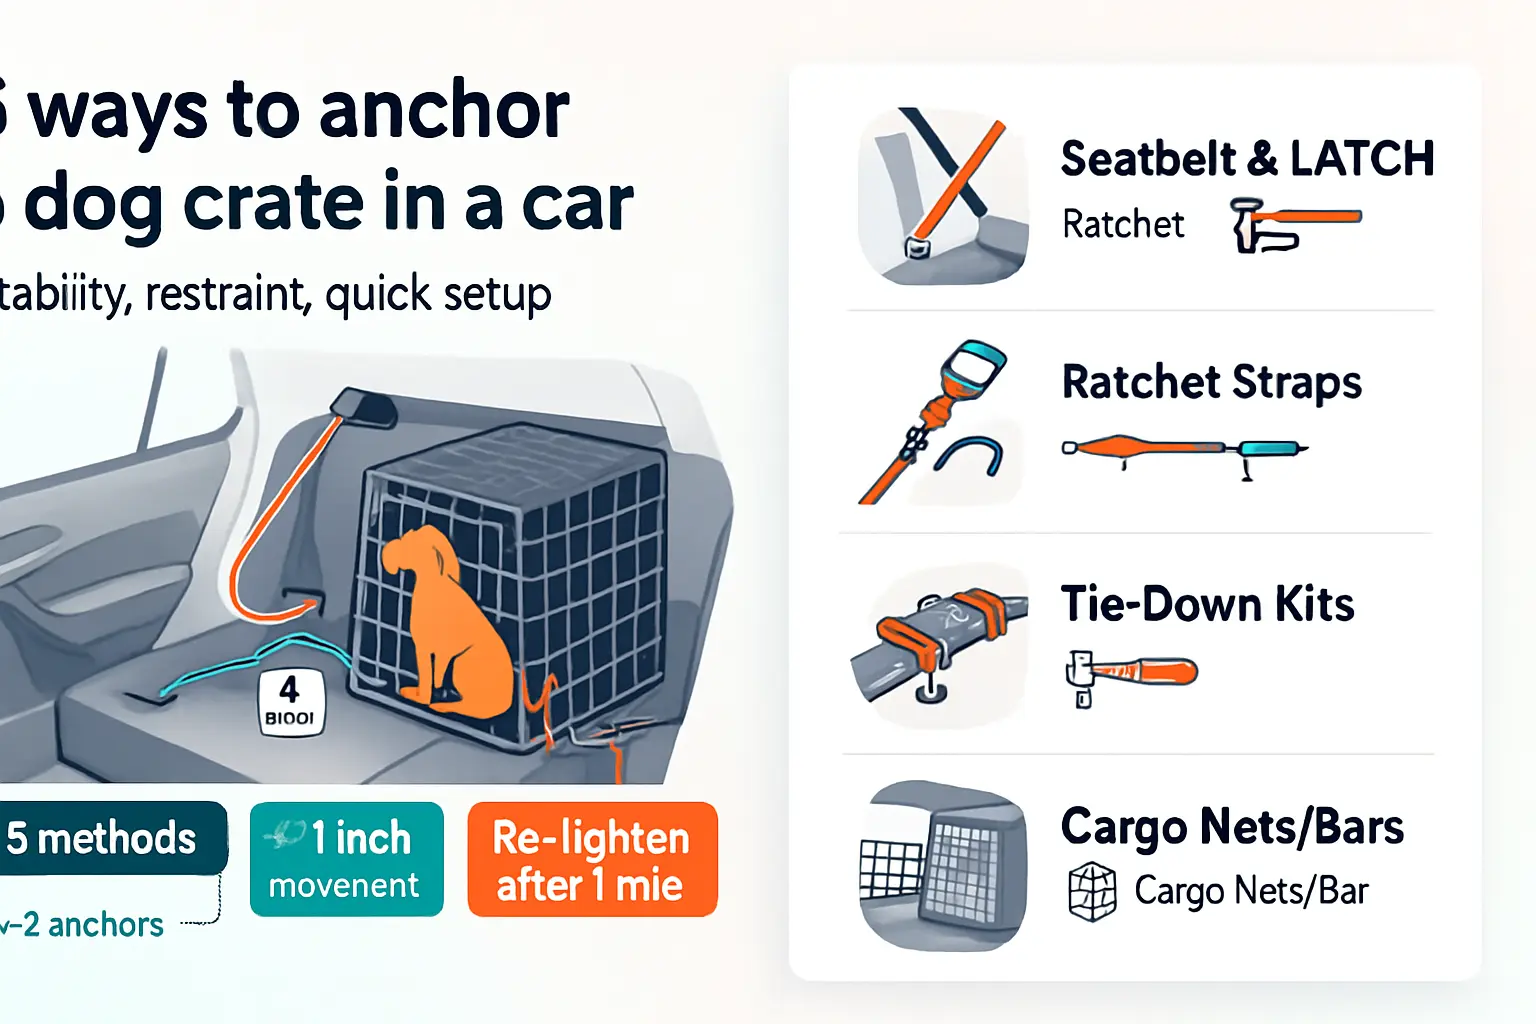
Owners face varied vehicle layouts and dog sizes when securing a crate. This section lists five dependable methods that prioritize restraint, stability, and quick setup. Each method suits different crates and trips, from short errands to long road journeys.
Use the method that matches crate style, vehicle anchor availability, and the dog’s size. Always confirm the crate sits flat and cannot slide or rotate under braking. Check the crate’s manufacturer instructions and the vehicle owner manual for OEM anchor limits. For additional tips on general in-car restraint options for pets, see how to secure a dog in car with leash.
Method 1 — Use existing seatbelt and OEM anchor points (how and when to use)
Seatbelts and OEM anchors offer a simple, low-cost way to secure many wire or plastic crates. Place the crate on the seat or floor so the vehicle’s lap or three-point belt reaches through the crate’s frame or attachment slots. Route the belt around the crate body, buckle, and tighten to remove slack. For extra hold, loop the belt through two opposite corners.
This method works best for medium and small crates in rear seats. Do not rely on seatbelts if the crate deforms easily. OEM lower anchors (LATCH) can work when adapter straps connect to the crate. Always inspect the belt for wear and test stability by attempting to slide the crate forward and side-to-side. For carrier-specific tips, consult how to secure a cat carrier in car.
Method 2 — Retractable ratchet or tie-down straps (attachment points, tensioning, pros/cons)
Ratchet straps provide strong, adjustable tension for heavy or large crates. Thread straps through the crate’s welded points or dedicated tie rings. Attach buckles to vehicle structural points like seat frames, factory D-rings, or cargo hooks. Tighten straps until the crate cannot move, but avoid over-tensioning that bends the crate frame.
Pros: high holding power, quick adjustability, works in many vehicles. Cons: straps can jam, edges may abrade crate surfaces, and incorrect anchors risk vehicle damage. Use soft loops or padding where straps contact crate corners. Owners should check ratchet mechanisms for free movement and re-tighten after the first mile. For broader gear guidance, see essential dog travel tips and gear for road trips.
Method 3 — Dedicated crate tie-down kits and vehicle cargo anchors (installation and compatibility)
Dedicated tie-down kits match crate models and include straps, buckles, and low-profile anchors. Kits mount to the crate’s base and to vehicle cargo anchor points or threaded inserts. Installation usually uses bolts or heavy-duty Velcro that resists pullout.
These kits reduce setup time and improve crash resilience compared with improvised straps. Confirm vehicle anchor spacing and load ratings before purchase. Some kits connect to the vehicle’s floor bolts or to aftermarket cargo anchors. Check compatibility notes for SUVs, sedans, and hatchbacks. When installing, torque hardware per kit instructions and perform a road test to verify stability. For securing crates in cargo areas, review how to secure a dog in the cargo area of SUV.
Method 4 — Positioning and securing the crate in the cargo area or trunk with cargo nets or bars
Positioning matters: a crate wedged against seats or bulkheads resists movement. Combine proper placement with cargo nets or adjustable load bars. Slide the crate snugly into the cargo well, ideally with the crate’s long side against the vehicle back seats.
Use cargo nets anchored to factory tie points to stop lateral motion. Load bars can compress the crate between the cargo wall and seat backs. This approach reduces reliance on straps and suits rigid crates and station wagons. Ensure ventilation and access to the dog remain clear. For RV and larger vehicle strategies, see 6 ways to secure a dog in 2-berth motorhome.
Method 5 — Using crash-tested in-vehicle crates or modular systems (advantages and when to choose)
Crash-tested crates or modular restraint systems offer the highest safety margin. Manufacturers design these systems to meet dynamic testing standards and to integrate with vehicle anchors. Choose them when transporting large dogs, frequent travel, or when maximum protection matters.
Advantages include engineered energy absorption, reinforced frames, and certified mounting hardware. Modular systems allow quick removal and secure fits across vehicle types. They cost more but reduce injury risk in severe collisions. Before buying, verify crash-test reports and vehicle compatibility. For model comparisons and reviews, consult best dog crates for car travel in 2023. Consider professional installation for permanent modular systems.
Best locations inside the vehicle and how to position the crate
The ideal crate location minimizes movement, maximizes ventilation, and keeps the dog within easy reach. Prioritize low, central positions that lower the crate’s center of gravity. Measure the crate and the vehicle space before travel to ensure a secure fit. Place the crate so its door faces an accessible opening, not the vehicle wall, to allow quick exit during emergencies.
Use a non-slip mat under the crate and level the floor surface where possible. Match the crate style to the vehicle: hard-sided crates work well in cargo areas, while soft carriers fit on rear seats. When vehicle anchor points exist, align the crate to use them. Avoid stacking cargo against the crate that could shift and crush it.
For crate selection and fitting guidance, consult a roundup of recommended options like best dog crates for car travel. Owners should test a short drive with the secured crate before long trips to confirm stability and comfort. If the crate still moves, add straps or reposition to a lower, more central spot.
Cargo area / trunk: setup tips and best practices
The cargo area often offers the most stable platform for medium and large crates. Position the crate against the back of the rear seats to reduce forward travel during braking. Use the vehicle’s cargo hooks or OEM tie-down points and secure the crate with heavy-duty ratchet or cam-buckle straps threaded through the crate frame.
Place a rigid barrier or folded blanket between the crate and loose cargo. A cargo barrier behind the rear seats adds protection from shifting items. Add a non-slip pad beneath the crate and tuck bedding so it cannot bunch and cause instability.
Ensure ventilation by leaving clear space around the crate’s sides and rear hatch. Check that the hatch opens freely and that the crate door can be reached without unloading the trunk. For step-by-step anchoring details specific to SUVs, see how to secure a dog in the cargo area of SUV. Re-check strap tension after the first few miles and at stops.
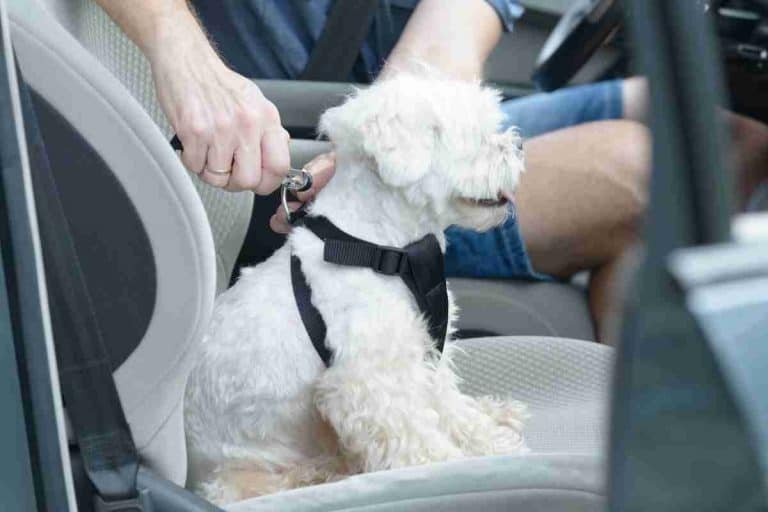
Rear seat and footwell: when it works and how to secure safely
Rear seats work best for small-to-medium crates or soft carriers. The seat surface reduces movement and provides a barrier if the seatback is up. Always place the crate on the seat rather than the floor when possible. Use the vehicle seat belt or LATCH anchors to secure the crate by threading the belt through the crate frame and locking it.
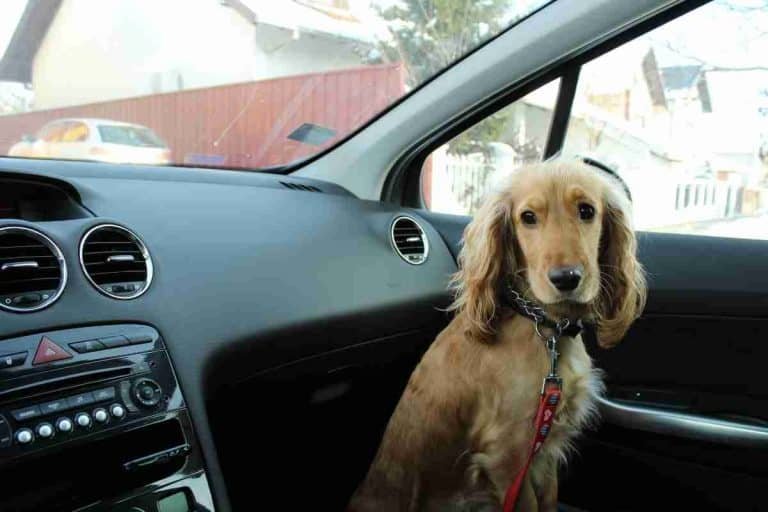
The footwell suits only very small carriers and short trips. Footwells offer less stability and poorer ventilation. If using the footwell, wedge the carrier against the seat and center console, and add a non-slip mat. Tethering the carrier to a fixed point limits sliding, but never substitute a simple leash tether for proper anchoring.
For legal and safety nuances about footwell travel and small carriers, consult are dogs allowed to travel in the footwell of a car. Always verify the crate does not block passenger controls or exits.
Locations to avoid (front seat, unsecured trunk-only placements, obstructing airbags)
Never place a crate in the front passenger seat. Airbag deployment can strike a crate with lethal force. Front seats also increase crash forces transmitted to the animal. Avoid placing a crate loosely in the trunk without anchors; unsecured crates become heavy projectiles during sudden stops.
Do not block airbags, emergency exits, or driver visibility with a crate. Keep crates away from doors used for emergency evacuation. Avoid narrow positions where a crate could wedge and prevent rescue access. Also avoid placing the crate where it could slide under the driver’s seat and obstruct pedals.
If vehicle anchor points are absent, retrofit secure attachment methods such as floor-mounted anchors or a professionally installed cargo barrier. For alternatives to crate-only restraint, review guidance on securing dogs inside cars at how to secure a dog in car with leash, but remember that tethering does not replace a properly anchored crate.
Step-by-step checklist to secure a crate before driving
Follow a concise checklist before every trip to keep the crate stable and the dog safe.
Quick pre-drive checklist
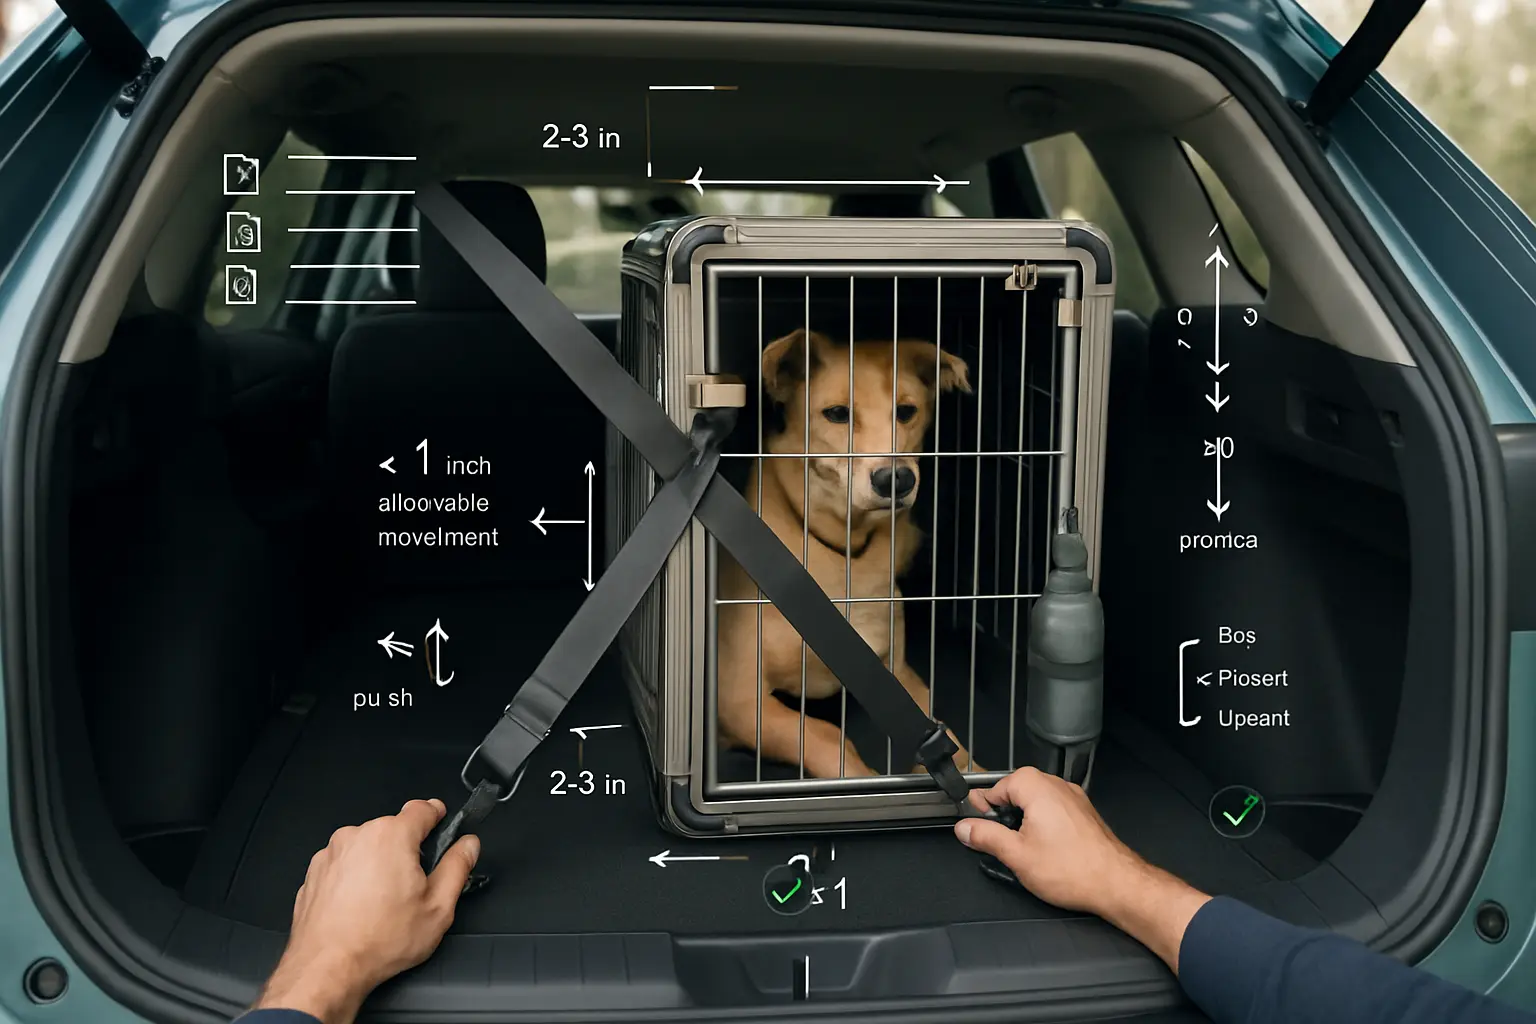
- Choose the spot: rear cargo area or back seat, low center of gravity.
- Measure clearance: allow 2–3 inches around the crate for ventilation.
- Add a non-slip mat under the crate to reduce sliding.
- Use at least two anchor points: seat belt + cargo strap or LATCH plus a tether.
- Thread belts through designated crate slots, not across wire sides.
- Tighten straps until the crate barely shifts when pushed.
- Secure the door latch and test the opening from outside.
- Remove loose objects that can hit the crate during sudden stops.
- Pack water, a familiar blanket, and ID on the crate.
Keep the checklist visible in the car or on a phone screen so drivers repeat the same steps every time. For broader road-trip gear and organization tips, see essential dog travel tips and gear for road trips.
Position, attach, tighten, and test — a concise process you can follow every time
Position the crate so its back rests against a solid surface. That reduces forward motion during braking. If using the back seat, face the crate rearward or parallel with the vehicle’s length for best stability.
Attach using two methods whenever possible. Thread a three-point seat belt through the manufacturer’s anchor points. Add a ratchet strap or cargo strap to a vehicle anchor or LATCH point. Use metal-to-metal connections and avoid tying straps to plastic trim.
Tighten straps in small increments. Pull straps until the crate moves less than an inch under firm hand pressure. Re-check strap paths to ensure no twists compressing the crate walls. Clip a short tether from the crate’s top ring to a solid vehicle anchor to limit tipping.
Finish by removing loose interior items and securing doors. For alternate securing techniques and leash-based restraint options, consult how to secure a dog in car with leash.
How to perform a stability test and what to look for
Perform three quick stability checks before every drive. First, push the crate from one side. Feel for rocking, twisting, or lifting at corners. Second, push forward and backward to simulate braking forces. Third, give a firm upward tug to check anchor integrity.
Look for these red flags:
- The crate shifts more than an inch under firm pressure.
- Straps slip through buckles or show frayed material.
- Plastic edges flex or crack near attachment points.
- Doors rattle or handles move when the crate is stressed.
If any issue appears, stop and re-route straps, add another anchor, or move the crate to a more secure location. A short, low-speed test drive with a passenger watching the crate helps reveal noise or movement not felt from the driver’s seat. For carrier-specific anchoring examples and tests, review how to secure a cat carrier in car.
Special steps for multiple crates or multiple pets
Securing multiple crates requires planning to prevent shifting, crowding, and stress. Space crates so air circulates between them. If space forces crates close together, bolt or strap crates to each other to form a single rigid unit.
Use individual straps for each crate plus a common cross strap that ties all crates to vehicle anchors. Avoid stacking crates unless the manufacturer rates them for vertical loads. When stacking, install anti-slip pads and locking brackets.
Distribute weight evenly across the vehicle floor. Heavy crates should sit low and near the vehicle center. Keep a buffer zone between crates and cabin occupants to prevent injury from sliding objects.
Label crates with pet names and emergency contacts. Ensure each pet has water and a familiar item. For configurations in tighter living or travel spaces, see practical methods in 6 ways to secure a dog in 2-berth motorhome. Perform a final group stability test before departure.
Comfort and care during travel
Comfort affects safety. A calm, well-cared-for dog stays settled in a secured crate and reduces distraction for the driver. Prepare the crate with attention to temperature, bedding, and scheduled stops. For broader packing and gear advice, consult essential dog travel tips and gear for road trips. Owners should also check a veterinarian before long journeys for health or medication needs.
Temperature control, ventilation, and avoiding heat stress
Maintain a stable cabin temperature between 65–75°F (18–24°C). Position the crate where vents provide gentle airflow but avoid direct drafts. Never leave a dog unattended in a parked car. Use sun shades and park in shaded areas during stops. For long trips, carry a digital thermometer for the crate and monitor dogs frequently for signs of overheating—excessive panting, drooling, or lethargy require immediate action.
Padding, familiar items, and reducing motion anxiety
Line the crate with a low-profile, non-slip pad that fits snugly. Add a favorite blanket or unwashed piece of clothing to provide familiar scent. Choose chew-resistant toys and avoid loose items the dog could swallow. For dogs with motion anxiety, a snug cover over parts of the crate can reduce visual stimuli. Consider prescribed calming aids only after veterinary consultation.
Breaks, hydration, and monitoring during long trips
Plan stops every 2–3 hours for toilet breaks, stretching, and short walks. Offer small amounts of water at each stop to prevent vomiting from drinking too quickly. Use a travel water bottle or bowl that clips to the crate. Observe posture, breathing, and behavior at each stop; note any changes and address them immediately. If a problem persists, end the trip early and seek veterinary care.
Common mistakes, troubleshooting, and myth-busting

Securing a dog crate requires attention to anchors, strap routing, and vehicle structure. Small installation errors turn into large hazards during sudden stops. The following subsections cover the most frequent mistakes, persistent myths, and the immediate steps to take after a crash or hard stop.
Frequent installation errors and how to fix them (loose straps, wrong anchors)
The most common error is leaving straps loose. Straps must sit tight against the crate frame and vehicle anchor. Thread seatbelt webbing straight through the crate’s frame or use purpose-made ratchet straps. Avoid attaching to headrest posts or trim clips; they fail under load. Use factory cargo tie-downs, L-track, or structural points rated for loads. Test the setup by pushing the crate from each side—movement should be minimal. Add a non-slip mat beneath the crate to reduce sliding. Inspect hardware for wear before every trip and replace frayed straps or rusty buckles. For more on vehicle anchors and securing setups, see How to secure a dog in the cargo area of SUV.
Myths about pet travel safety (front seat safety, “quick errands”)
Airbags make the front seat dangerous for crates and unrestrained pets. The back seat or cargo area is safer. Short drives carry the same crash forces as long trips; quick errands still require a secured crate. Another myth: soft carriers protect better than hard crates. Hard, crash-rated crates resist deformation and protect the animal. Also avoid relying on a leash tied to the seat—leashes can snap or cause strangulation.
What to do after an accident or a hard stop
After any collision or severe stop, move to a safe location and check the animal immediately. Look for bleeding, labored breathing, abnormal behavior, or limping. Photograph crate damage and anchor failure for records. Even if the dog looks fine, a vet check is essential—internal injuries can appear later. Retire any crate that shows frame bends, cracked plastic, or compromised latches. Replace straps and anchors involved in the event. If unsure about the vehicle’s anchor integrity, have a mechanic inspect them before the next trip. If immediate veterinary care is needed, call a local clinic or emergency vet without delay.
Quick buying guide: what gear to prioritize
When preparing to follow 5 Ways to Secure a Dog Crate in a Car for Safe Travel, buyers should prioritize gear that reduces movement, resists failure, and fits the vehicle. Choose a crate sized to allow the dog to stand, turn, and lie down. Pickup a restraint system rated for vehicle use rather than relying on household straps.
Prioritize items that meet published strength ratings and that use automotive-grade buckles or steel hardware. Length matters: straps should allow a tight anchor without excess slack. Look for adjustable straps that lock securely at multiple points.
Allocate the budget toward a quality anchor system and a well-built crate before spending on accessories. For a practical checklist and equipment recommendations, see essential dog travel tips and gear for road trips.
Buy gear that installers can tighten without special tools. Choosing proven hardware and the right crate size reduces driver distraction and injury risk during sudden stops.
What to look for in straps, anchors, and hardware (ratings, materials, length)
Straps and anchors must show clear strength ratings, usually in pounds or kilonewtons. Steel hardware outperforms plastic under shock loads. Confirm buckles and car-anchoring fittings meet automotive standards, such as ISO or SAE where listed.
Select webbing made from high-tenacity nylon or polyester. Nylon stretches slightly, absorbing shock. Polyester stretches less and resists UV and moisture. Pick a blend that matches the expected environment.
Length affects tensioning. Measure the vehicle mounting points and the crate footprint before ordering straps. Choose anchored systems that attach to factory tie-downs, seat bolts, or the vehicle’s cargo rails.
Quick-release buckles help with daily use, but add a secondary locking feature for long trips. For practical guidance on securing pets in vehicles and compatible anchor methods, consult how to secure a dog in car with leash.
Crate features worth paying for (crash testing, fit options, easy installation)
Crash-tested crates provide measurable safety benefits. Look for crates with third-party testing or certifications that document performance in frontal and side impacts. Manufacturers that publish test results show transparency.
Adjustable-fit crates and modular inserts let users adapt a single unit to multiple vehicles. Choose crates with removable panels or brackets that allow a snug fit against seats or cargo walls. A tight fit minimizes forward momentum during sudden deceleration.
Install-friendly features save time and increase correct usage. Quick-lock mounting points, integrated strap channels, and built-in anchor points allow repeatable, secure installs without improvisation.
Durable materials matter: high-grade aluminum, reinforced polymer, and welded steel corners resist deformation. For model comparisons and travel-specific crate reviews, see best dog crates for car travel in 2023.
Maintenance tips and how to inspect gear regularly
Set a regular inspection schedule. Check straps, buckles, and anchors every month during active use. Look for fraying, pulled stitching, UV damage, or chemical degradation. Replace any webbing with visible wear immediately.
Inspect metal hardware for corrosion, cracks, or deformation. Test buckles and ratchets under tension before each long trip. Tighten fasteners to the manufacturer’s torque specifications when applicable.
Clean crates and straps with mild detergent and water. Avoid bleach or solvents that weaken fibers and finishes. After washing, air-dry straps away from direct sunlight to limit UV breakdown.
Document replacements and repairs in a simple log. A short monthly check reduces the chance of failure on the road. For tips on securing carriers and keeping gear serviceable, refer to how to secure a cat carrier in car.
CTA: Add a calendar reminder to inspect gear before any major trip. Regular checks preserve safety and prevent last-minute surprises.
Summary
Securing a dog crate correctly protects the dog and everyone in the vehicle by preventing sliding, tipping, and projectiles during sudden stops or collisions. This guide explains how to choose the right crate, position it safely, and anchor it using five proven methods that work across different vehicles and crate styles.
By pairing smart placement with strong anchors—seat belts, ratchet straps, dedicated tie-down kits, cargo nets/bars, or crash-tested systems—drivers can create a stable setup that withstands real-world forces. A repeatable pre-drive checklist, stability tests, comfort measures, and routine gear inspections keep each trip safer, calmer, and compliant with common regulations.
Key Takeaways
- Match crate and method: Choose a rigid, properly sized, preferably crash-tested crate; then secure it using a method compatible with your vehicle’s anchors.
- Prioritize placement: Position the crate low and central—cargo area against the rear seatbacks or rear seat—while avoiding the front seat and airbag zones.
- Use two anchors: Combine at least two points (e.g., seat belt plus a ratchet/cargo strap) to limit movement in all directions and distribute crash forces.
- Tighten and test: Straps should allow less than 1 inch of movement; re-check after the first miles and run a quick side, fore-aft, and upward pull test before each drive.
- Comfort supports safety: Maintain ventilation and temperature, use a non-slip pad and familiar items, and plan hydration and stretch breaks every 2–3 hours.
- Inspect and replace: Check straps, buckles, anchors, and crate structure regularly; retire damaged gear and replace any equipment involved in a crash.
FAQ
- What is the safest place to put a dog crate in a car?
Place it low and central—ideally in the cargo area pressed against the back of the rear seats or on the rear seat. Avoid the front seat and any spot that could interfere with airbags or driver visibility. - How tight should the straps be when securing the crate?
Tighten until the crate moves less than 1 inch under firm hand pressure. Use at least two anchor points and re-tighten after the first mile and at fuel or rest stops. - Why choose a crash-tested crate or modular system?
Crash-tested systems provide engineered energy absorption, reinforced frames, and certified hardware that perform better in severe impacts—especially for large dogs or frequent travel. - How can someone secure a crate if the vehicle lacks cargo anchors?
Use rear seat belts or LATCH points with proper adapters, or add aftermarket cargo anchors/barriers installed to structural points. Avoid attaching to trim, headrests, or weak fixtures. - What should drivers do after a hard stop or collision?
Move to safety, check the dog for injuries, and seek veterinary evaluation even if the dog looks fine. Inspect and replace any damaged crate, straps, or anchors before the next trip.