6 Easy Ways to Secure Your Dog in a 2‑Berth Motorhome
Last Updated on August 22, 2025
A compact 2‑berth motorhome leaves little margin for error. Sudden stops can turn a pet and loose gear into projectiles. Laws in many regions demand restraint. Owners seeking to secure a dog in a 2‑berth motorhome need space‑smart, crash‑worthy solutions. 6 Easy Ways to Secure Your Dog in a 2‑Berth Motorhome outlines harnesses, crates, barriers, tethers, playpens, and bed zones that protect without clutter.
This guide shows how to measure layouts, locate structural anchor points, and choose gear matched to size and temperament. It explains installation, torque checks, and road‑testing, then adds training routines and emergency prep. Readers gain practical steps for ventilation, legal compliance, and calm travel from driveway to campsite.
Key safety considerations before fitting restraints
Fitting restraints starts with an awareness of the forces a crash can produce and how different restraint systems behave. Choose solutions rated for vehicle use and, where possible, crash-tested. Consider three main restraint categories: a properly secured crate, a harness anchored to vehicle mounting points, or a fitted travel bed with barriers.
Match the restraint to the vehicle’s available anchor points and the dog’s size. Confirm anchor locations on the motorhome chassis or manufacturer guide. Avoid improvising attachment points to interior trim. Remove or secure loose items that could become projectiles during sudden braking.
Ventilation, temperature control and easy access matter. Position the travel zone so the dog has airflow, shade and a clear escape route in an emergency. Plan for short trial runs to check behaviour and fit before a long journey. For broader packing and gear suggestions that support safe trips, see essential dog travel tips and gear for road trips.
Assess your dog’s size, age, temperament and motion tolerance
Begin by recording the dog’s weight, shoulder height and body length. Use these dimensions to select crate internal size or harness fit. Puppies and elderly dogs need gentler handling and may require smaller, more sheltered spaces.
Temperament affects restraint choice. Anxious or high-energy dogs may pace, so a stronger barrier or crate suits them better than a loose harness. Calm dogs often do well with a harness attached to a tested anchor point.
Test motion tolerance with short drives and increase duration gradually. Watch for signs of motion sickness: drooling, lip-licking, yawning or lethargy. Conditioning and brief acclimation sessions reduce stress before committing to a long trip. For strategies to help motion-sensitive dogs enjoy car rides, consult make car rides enjoyable for your motion-sick pup.
Vet check, up-to-date ID/microchip and legal requirements
Schedule a veterinary check well before travel. The vet can confirm the dog’s fitness to travel, update vaccinations and advise about motion-sickness medication. Avoid sedatives unless the vet prescribes them; they can impair thermoregulation and balance.
Confirm that the microchip details and ID tag contact information are current. Carry proof of vaccination, microchip number and any medication records. For cross-border trips, check quarantine and vaccine rules for each country on the route.
Review local laws on animal restraints in vehicles and any insurance requirements. Many regions require animals to be controlled to prevent driver distraction. Book the vet visit and assemble a travel folder with documents, plus a compact first-aid kit and spare leash.
For non-pharmaceutical calming options and prep tips, see 9 natural ways to remedy your dog’s travel anxiety.
Measure your 2‑berth layout and designate a travel-safe zone
Measure the motorhome interior before choosing a restraint. Record floor length, width and seat distances. Note fixed furniture, access paths and the nearest vehicle anchor points. Use these measurements to select a crate or harness that fits without blocking exits.
Designate a travel-safe zone where the dog can stay during motion. Prefer a low, central location away from windows and sudden heat sources. Ensure the area allows secure anchoring to the vehicle’s structural points. If using a crate, place it so the door opens to a clear exit.
Secure the chosen restraint to strong mounting points. Use rated tie-down straps, seatbelt adapters or anchor rings fixed to the chassis. Add non-slip matting underneath crates to reduce sliding. Remove loose bowls and secure water in spill-proof containers. For practical methods to fasten crates and reduce movement, consult 5 ways to secure a dog crate in car.
Six practical ways to secure a dog in a compact motorhome
The title 6 Easy Ways to Secure Your Dog in a 2‑Berth Motorhome frames the priorities: safety, space economy and comfort. This section lists approaches the rest of the post expands on. Each method trades off footprint versus restraint level and owner convenience. Choose solutions that match the dog’s size, temperament and the motorhome layout. For quick gear and packing ideas, consult essential dog travel tips and gear for road trips. Owners should check local laws about dog restraints and test any setup on short runs before long drives. Fit and function matter more than brand names; measure floor area and anchor strengths first.
Use a vehicle-rated harness clipped to a seatbelt or anchor
A vehicle-rated harness keeps a dog restrained while allowing some movement. Choose a harness rated for crash testing or sold specifically for car travel. Size the harness so it fits snugly but allows two fingers under straps. Clip the harness to a seatbelt adaptor or a factory tether point using a short, strong lead. Avoid long leashes; they let a dog become a projectile in sudden stops. Carry a spare harness and quick-release buckle checks. For step-by-step attachment tips and leash alternatives, see how to secure a dog in car with leash. Regularly inspect stitching and metalwork for wear.
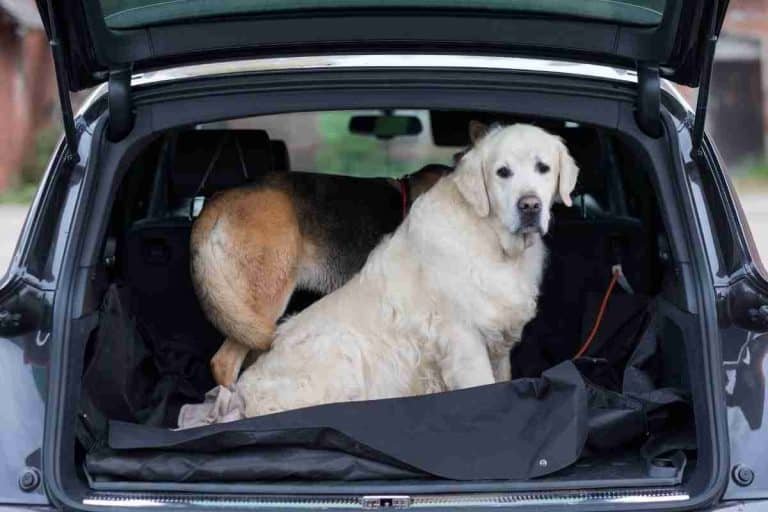
Travel in a crash-tested or firmly fastened crate or carrier
Craters provide the highest protection when properly secured. Select a crash-tested crate sized so the dog can stand, turn and lie down. Place the crate on the motorhome floor where it cannot slide or tip. Use ratchet straps or bolted brackets to fasten the crate to structural points. Avoid soft carriers for freeway speeds. Add a familiar blanket and non-slip mat inside to reduce stress. Check ventilation and emergency access; the dog must be reachable quickly. For crate choices and mounting tips, consult a review of travel crates like best dog crates for car travel. Label the crate with contact details and medical notes.
Set up a portable playpen or foldable pen anchored to the floor
A portable playpen works well for medium stops and calm driving at low speeds. Choose a heavy-duty, foldable pen that locks open and has low profile edges for entry. Anchor the pen to the floor with hooks or non-slip anchors designed for RV flooring. Add a secure clip-on bowl and a chew-safe toy to keep the dog occupied. Use a pen when the dog needs a contained area to rest outside a crate but still stay off furniture. For campsite and campground packing tips that include portable containment, see hammock camping tips with your dog. Remove the pen for highway stretches if it cannot be firmly secured.
Fit fixed interior anchor points with short webbing tethers
Installing fixed anchor points provides a low-footprint restraint option. Fit stainless steel D‑rings to structural floor or wall beams using through-bolts and backing plates. Use short webbing tethers with locking carabiners to attach a harness or padded belt. Keep tethers short to limit forward travel in abrupt stops. Position anchors so the dog can lie comfortably without reaching the driver area. Perform a pull test to at least several times the dog’s weight rating before use. For guidance on anchor placement and load considerations, owners can reference techniques used when securing dogs in vehicle cargo areas like how to secure a dog in the cargo area of an SUV.
Install a secure pet gate or cab barrier between driver and living area
A robust pet gate or cab barrier prevents the dog from entering the cab and distracting the driver. Choose metal or rigid composite barriers that bolt to mounting points or use tension systems sized to the doorway. Ensure the gate has no wide gaps and includes a quick-access human door for emergencies. Some barriers fold to store when not in use. Check compatibility with airbags and cab seat movement. Gates work best in combination with a harness or tether, for redundant safety. For rules and practicalities of dog positioning in vehicles, owners may review considerations similar to those discussed at are dogs allowed to travel in the footwell of a car.
Create a non-slip, dedicated bed zone with restraint options
Designate a low-profile bed area near an anchor or inside a crate. Use a heavy, non-slip mat beneath the bed to prevent sliding on turns. Choose washable bedding and a bolstered bed that discourages roaming. Integrate restraint options: a short tether point, crate door or secure harness attachment nearby. For anxious dogs, include a familiar-smelling blanket and a calming chew. Ensure the bed sits clear of cookware, gas lines and appliances. When space is tight, modular beds that double as storage optimize footprint. For quick ideas about travel bedding and containment, owners can refer to practical travel gear posts like 5 ways to secure a dog crate in car.
How to install, anchor and test each option safely

Owners should treat each restraint option as a mini installation project. First, identify solid anchor points on the motorhome chassis or factory seat‑belt mounts. Avoid attaching to trim, thin panels or lightweight furniture. Use rated hardware: M8–M10 bolts, marine‑grade straps or vehicle safety anchors that meet crash‑test standards.
For each method, follow a three‑step process: locate and fit anchors, secure the device per manufacturer instructions, then test under controlled load. Tug each anchor with body weight, check for slippage, and inspect webbing and buckles for frays. Record torque values for bolted anchors so the owner can recheck after the first 100 miles.
When selecting gear, consult an equipment overview such as essential dog travel tips and gear for road trips to compare harness ratings, crate types and anchor kits. Keep the installation area tidy and ensure breathing room for the dog. Use locknuts or threadlocker where vibration could loosen bolts. Finally, schedule a short, low‑speed road test to validate every attachment before a long journey.
Proper harness attachment, routing and buckle checks
Choose a crash‑tested, vehicle‑rated harness sized to the dog. The harness must fit snugly without restricting breathing. Align the harness dorsal ring or attachment point with the dog’s shoulders to avoid neck torque during a sudden stop.
Attach the harness to the motorhome anchor with a short, fixed-length tether. Route the tether so it runs alongside the dog’s body, not across the face or limbs. Keep excess webbing coiled and secured; long slack increases forward momentum.
Perform buckle and stitching checks before every trip. Pull on each buckle and run fingers along seams for weak spots. Swap in a backup tether during initial trials to confirm the primary failsafe holds. For step‑by‑step harness techniques and leash alternatives, see how to secure a dog in car with leash.
Crate anchoring techniques and preventing forward/backward travel
Use a rigid, crash‑rated crate sized so the dog can stand, turn and lie down. Place the crate on a flat surface and anchor it at multiple points: two forward‑facing and one rear‑facing attachment reduce both forward and backward travel.
Methods include bolting metal L‑brackets to the motorhome floor and the crate base, using ratchet straps through integrated crate anchor slots, or fitting a cargo‑grade restraint bar against the crate face. Distribute load across chassis points rather than thin interior panels.
Prevent sliding by adding a non‑slip mat beneath the crate and a rear bumper block to limit backward movement. After installation, simulate a crash load by applying progressive force to the crate’s front and rear. For more anchor options and instructions, consult 5 ways to secure a dog crate in car.
Securing gates, playpens and bedding to stop shifting on bumps
Gates and playpens require low‑profile anchoring to avoid trip hazards while stopping lateral movement. Secure playpen legs with webbing straps to floor anchors or to furniture frame members. Add corner straps to prevent racking on side loads.
Bedding can become a projectile. Use mattress straps or fitted covers that clip to the playpen frame or crate interior. For foldable gates, fit anti‑sway brackets or quick‑release pins into reinforced side tracks. Avoid adhesive solutions alone; vibration and temperature changes can weaken glue.
Choose collapsible playpens with integrated anchor points or retrofit with sewn‑in D‑rings. Inspect elastic or Velcro attachments regularly. For ideas on making mobile enclosures secure, see rv modifications for cats, which include practical anchoring methods adaptable for dogs.
Road‑test checklist: progressive speed tests and observation points
Road testing validates installations under real conditions. Start with static load checks, then move to a controlled parking‑lot run. Use a progressive testing plan: low‑speed (0–15 mph), moderate‑speed (15–35 mph), then highway‑speed segments if the setup holds.
At each stage, observe the dog for signs of discomfort: panting, heavy shifting, escape attempts, or sudden silence. Watch for hardware movement, strap stretch, or seat‑panel flexing. Stop and retorque bolts after the first test and again after 50–100 miles.
Create a short checklist to carry during all trips: anchor torque values, harness size, tether length, crate tie‑down points, and a pre‑drive buckle inspection. If motion sickness or anxiety appears, consult travel‑anxiety strategies or a veterinarian. For testing tips and calming techniques, review no more doggie dramas: motion sick pup. Owners should schedule a professional inspection if any attachment fails a test.
Training and routines to keep your dog calm and compliant on the move
Successful travel in a 2-berth motorhome depends on consistent routines. Establish a clear sequence for departures, drives and stops. A predictable ritual signals safety and reduces anxiety. For example: leash on, short walk, toilet break, crate or harness, then departure. Maintain consistent sleeping and feeding zones so the dog learns where to rest.
Keep the motorhome environment calm. Use low lighting, soft fabrics and a single designated mat or bed. Limit sudden access to the cab during driving. Drivers should avoid engaging the dog while the vehicle moves.
Build short, regular practice trips into the schedule. Start with five-minute runs, then increase time and complexity. Track responses and adjust pace if the dog shows stress signs.
Pack familiar bedding and a small set of favored toys to preserve routine on the road. For broader gear and planning suggestions, see Essential dog travel tips and gear for road trips. Try a short practice route this weekend to test the routine and make small improvements.
Crate/harness desensitization and short practice drives
Desensitization builds confidence. Begin by placing the crate or car harness in the living space with the door open. Allow the dog to explore freely. Feed meals near or inside the crate so it becomes a positive place.
Introduce the harness in stages. Let the dog sniff and wear it for a few minutes at home. Reward calm behavior with treats and praise. Gradually extend harness time across several days.
Move to short practice drives once the dog accepts the crate or harness. Keep initial trips under ten minutes. Use high-value treats and a steady, cheerful tone. End each drive with a pleasant activity, like a walk or play session, to pair travel with rewards.
Secure the crate to prevent shifting. Use vehicle anchor points, bolts or non-slip mats and straps designed for automotive travel. For crate selection and stabilizing tips, consult the review at Best dog crates for car travel in 2023. Increase drive length only when the dog shows calm, relaxed behavior.
Pre-drive exercise, toilet breaks and feeding schedule tips
Proper timing of exercise, toilet breaks and meals prevents discomfort and accidents. Aim for 20–40 minutes of active exercise before longer drives. A tired dog settles faster and experiences less motion-related stress.
Offer a toilet break 10–15 minutes before departure. Keep the break consistent so the dog learns the routine. For longer travel days, schedule regular stop intervals for exercise and elimination.
Adjust feeding schedules to reduce nausea. Avoid large meals within two to three hours of departure. Offer small amounts of water up to departure time, then moderate intake during the trip. Test timing on short runs to find what works for each dog.
If motion sickness appears, consult a veterinarian for medications or natural remedies. Many handlers find that gradual conditioning plus consistent pre-drive protocols greatly reduce travel sickness. For additional tips on making car rides easier for motion-sensitive dogs, see No More Doggie Dramas: how to make car rides enjoyable for your motion-sick pup.
Use of familiar toys, positive reinforcement and low‑stress cues
Familiar items and structured rewards ease travel anxiety. Keep a small rotation of the dog’s favorite toys available. Place a toy in the crate or harness area to provide comfort and diversion.
Use short, consistent cue words for calm behavior. A single word like “settle” or “mat” paired with a gentle hand gesture works well. Immediately reward compliance with a soft treat or touch. This conditions the dog to respond to low-stress signals.
Practice mat or place training so the dog learns to relax on a defined surface. Reward the dog for remaining on the mat during brief distractions and while the motorhome moves. Avoid punishment; it increases stress and undermines trust.
Consider calming aids such as pheromone sprays, pressure wraps, or vet-approved supplements when appropriate. Combine these with positive reinforcement and predictable cues. For natural anxiety remedies and additional strategies, consult 9 natural ways to remedy your dog’s travel anxiety. Pack one favorite toy and reward calm behavior consistently on trips.
Emergency gear and quick actions for incidents on the road
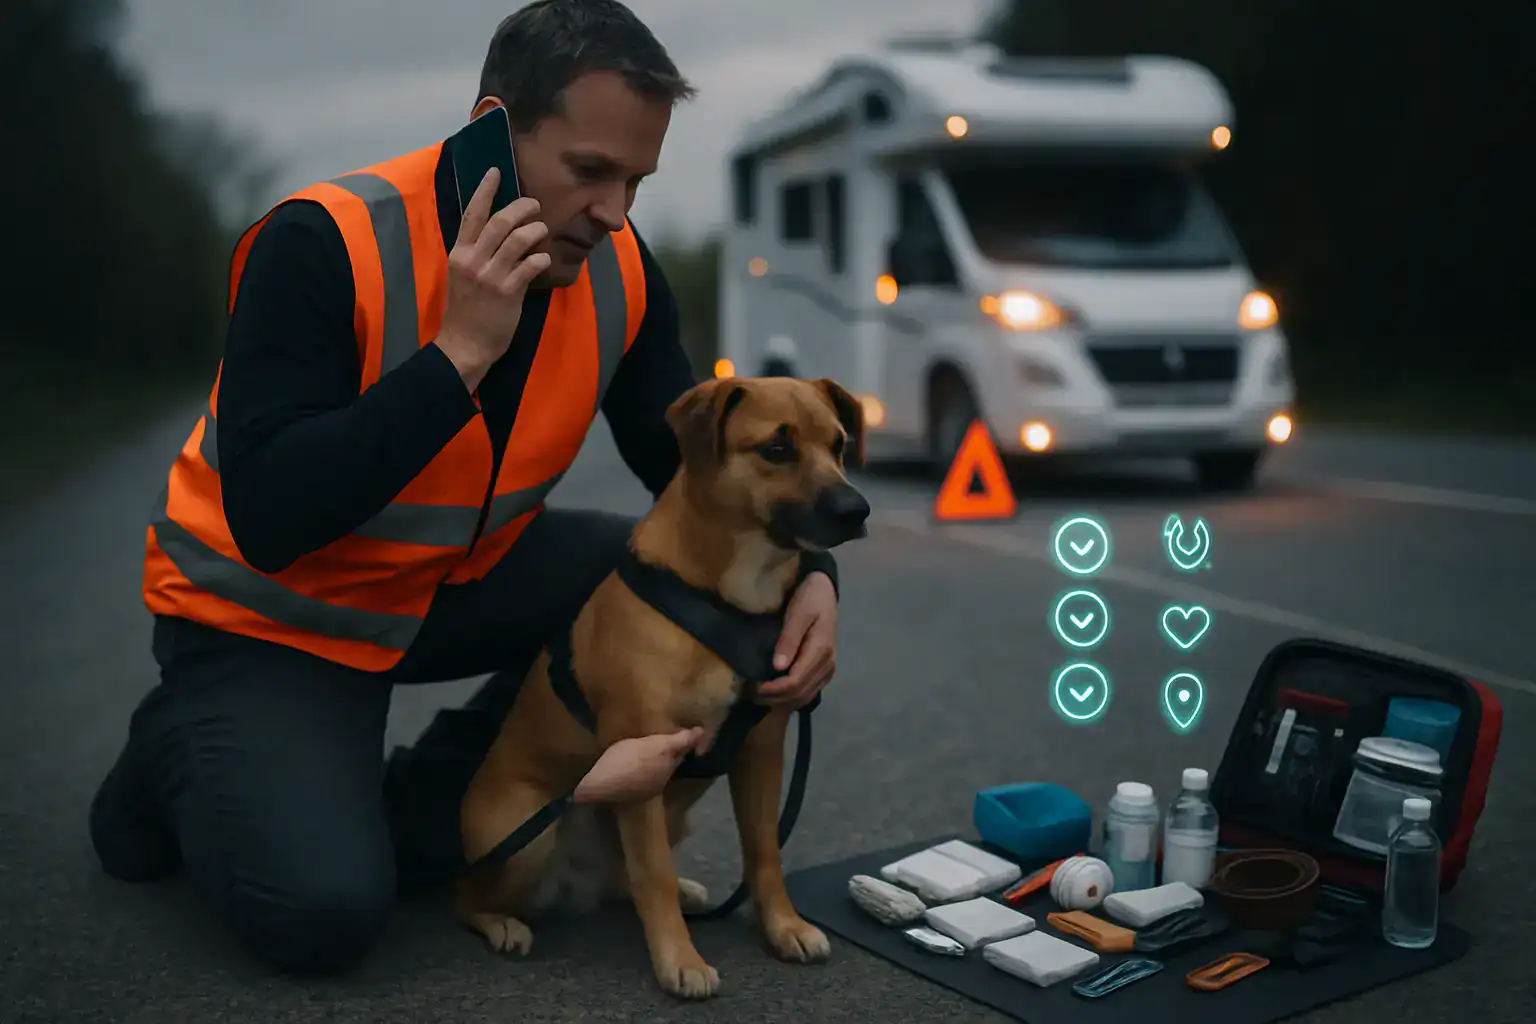
When an incident occurs, the priority remains the dog’s safety and the occupants’ immediate well‑being. Pull off the road safely, engage hazards, and park on stable ground away from traffic. Secure the dog in a collar or harness, then assess breathing, bleeding, and consciousness. Use a muzzle if the animal is injured and likely to bite.
Keep a compact emergency stash in a marked, easy‑reach spot. Include a sturdy leash, collapsible carrier, reflective vest for night visibility, bottled water, a blanket, and a flashlight. Store important documents — vaccination records, microchip number, and the vet’s contact — in both physical and digital form.
Call a local emergency vet or roadside service if the dog requires immediate care. For basic preparation and gear suggestions for road trips, see essential dog travel tips and gear for road trips. Regularly rehearse the steps with the dog so quick actions become routine during stress.
Quick checklist:
- Stop safely and secure the dog
- Control bleeding and check airway
- Contact emergency vet and get directions
- Move to a safe area and document the incident
Keep the emergency stash replenished and visible. A prepared motorhome reduces confusion and speeds care.
Compact dog first-aid kit and essential meds to always carry
A compact first‑aid kit tailored for dogs reduces response time during common roadside incidents. Use a waterproof pouch and label every item. Core supplies include sterile gauze, non‑stick pads, self‑adhesive bandage wrap, adhesive tape, antiseptic wipes, blunt tweezers, styptic powder for minor bleeds, and a digital thermometer.
Add canine‑specific items: a soft muzzle, disposable gloves, saline eye flush, a small flashlight, and a thermal blanket. Keep a lightweight splint material and instant cold pack for sprains. Store copies of vaccination records and a recent photo for identification.
Carry only vet‑approved medications. Typical inclusions are an antihistamine approved and dosed by a veterinarian for allergic reactions and any prescribed medications the dog needs. Do not give human painkillers or anti‑inflammatories without veterinary guidance. Track expiration dates and keep meds in a sealed container.
For motion‑related nausea and natural calming strategies to reduce the need for meds, consult resources like motion-sickness and calming tips. Review the first‑aid kit quarterly and replace used or expired items.
Temperature and ventilation monitoring plus quick‑release options
Temperature control in a 2‑berth motorhome matters. Heat builds rapidly, and poor ventilation stresses dogs. Install a digital thermometer or a smart temperature sensor visible from the driving area. Add a battery‑operated fan and a carbon monoxide detector for safety.
When parked, crack vents and windows enough to allow airflow while preventing escape. Use screened openings or window guards to keep the dog inside. Avoid leaving dogs unattended in direct sun. For long stops, park in shaded areas and run low‑speed climate control or fans.
Equip the dog with a harness featuring a quick‑release buckle and practice its use. Quick‑release systems let an owner free a trapped dog or disconnect a tether fast during emergencies. Carry a short, sturdy tether with a locking carabiner and a secondary leash kept in a separate compartment. Avoid breakaway collars for tethering; use breakaway only where entanglement risk outweighs retention.
For ideas on improving airflow and safe modifications in small RVs, see RV modifications that improve ventilation. Test all quick‑release gear before travel and train the dog to remain calm when equipment activates.
Lost-dog and escape response plan (leash, carrier, local contacts)
An escape plan reduces panic and boosts recovery speed. Prepare an accessible escape kit containing a spare leash, collapsible carrier, current photo, copies of ID tags, and microchip details. Keep printed contact information for local shelters and emergency clinics in the motorhome and on a phone contact labeled clearly.
If the dog escapes, secure the vehicle and create a calm perimeter. Search the immediate area first, checking hiding spots and under vehicles. Leave an item with the dog’s scent near the last known location. Post brief, clear notices with photo and contact details on local social media and neighborhood apps.
Call nearby shelters and vets immediately and ask them to flag new intakes. Microchip companies offer lost‑pet reporting; file a report and update location settings if available. Use community groups and local lost‑pet pages to amplify alerts.
Prevention matters: use a double‑clip leash system when opening doors. Anchor a safety line for bathroom breaks and always load the dog into the carrier or secure harness before opening exterior doors. For practical guidance on leash-based restraints in vehicles, consult how to secure a dog in a car with a leash. Store the escape kit where any passenger can grab it quickly.
Picking the right solution for your dog and motorhome layout
Choice depends on dog size, behaviour, motorhome layout, trip length and budget. Owners should prioritise containment, crash safety and comfort. Measure available floor and berth space. Note door and aisle widths, tie-down points and furniture that can anchor equipment. Match restraint type to likely situations: driving, overnight and when the motorhome is stationary.
Match options to dog size, behaviour, trip length and budget
Small, calm dogs do well in a travel crate or soft carrier secured with straps. Active or anxious dogs benefit from a full-size, heavy-duty crate or a certified crash-tested harness attached to a reinforced anchor. Long trips require a crate with room to stand and turn, plus absorbent bedding. For limited budgets, secure a sturdy harness and use fixed anchor points rather than buying an expensive custom crate. Always check weight ratings and ventilation.
Fast recommendations for common scenarios (small, large, escape artists)
Small dogs: use a bolted soft crate or carrier under a fixed bunk, add non-slip matting. Large dogs: choose steel or heavy plastic crates anchored to the floor or furniture with ratchet straps. Escape artists: get a reinforced crate with lockable latches, or dual-clip harness systems that attach to two separate anchors. For anxious dogs, a covered crate and familiar bedding reduce stress. Test any setup on short drives first.
Where to buy or have equipment professionally installed
Buy certified travel crates, harnesses and tie-down kits from specialist pet retailers and reputable online stores. RV outfitters and marine upholstery shops can fit floor anchors, bolt crates to chassis points, or modify cabinetry for secure mounting. An RV technician ensures anchors meet load requirements. For practical gear recommendations and packing tips, consult this essential dog travel tips and gear for road trips. Consider professional installation for any permanent anchor or bolted crate to ensure safety.
Summary
6 Easy Ways to Secure Your Dog in a 2‑Berth Motorhome outlines practical, space‑smart methods to restrain and protect a dog on the move. The guidance starts with safety fundamentals—selecting vehicle‑rated, preferably crash‑tested gear; matching restraint type to the dog and the RV’s anchor points; and positioning a central, well‑ventilated travel zone—then moves into six proven setups, from anchored crates and vehicle‑rated harnesses to fixed tethers, barriers, and dedicated bed zones.
The post also details how to install and test equipment, build calm travel routines, and prepare emergency gear and temperature monitoring. With measurements, correct anchoring, short tethers, progressive road tests, and consistent training, owners can achieve a secure, comfortable setup that fits a compact 2‑berth layout.
Key Takeaways
- Prioritize crash safety: Choose a crash‑tested crate or a vehicle‑rated harness; anchor only to structural points (seat‑belt mounts, chassis) and avoid trim or furniture.
- Measure before buying: Record the dog’s size and the RV layout; place the travel zone low and central with clear emergency access and ventilation.
- Keep movement short and controlled: Use short tethers, non‑slip mats, and secure all loose items to prevent projectiles.
- Install and verify: Fit anchors with rated hardware, then run progressive road tests; re‑torque after 50–100 miles and inspect webbing and buckles before every trip.
- Train for calm travel: Desensitize to crates/harnesses, use pre‑drive exercise and consistent routines, and reinforce relaxed behavior.
- Plan for incidents: Carry a dog‑specific first‑aid kit, maintain current ID/microchip and documents, and monitor temperature and airflow continuously.
FAQ
-
What is the safest way to secure a dog in a 2‑berth motorhome?
A rigid, crash‑tested crate firmly anchored to structural points offers the highest protection. A certified vehicle‑rated harness attached to a tested anchor is a strong alternative when a crate won’t fit. -
How short should a tether be and where should it attach?
Keep the tether just long enough for standing, lying, and turning without reaching the cab or becoming airborne. Attach to factory seat‑belt mounts or installed D‑rings with backing plates, not to interior trim. -
How do owners locate or add proper anchor points in a small RV?
Use the manufacturer’s guide to find seat‑belt mounts or chassis points, or have an RV technician install stainless D‑rings with through‑bolts and backing plates. Avoid screws into thin panels or furniture. -
Why should soft carriers be avoided at highway speeds?
Most soft carriers lack crash protection and can tear or shift, turning into hazards. A rigid, crash‑rated crate better resists impact and secures more reliably. -
How should a setup be road‑tested before long trips?
Start with static load checks, then run low‑speed, moderate, and highway segments while watching the dog and hardware for movement or stress. Re‑torque hardware and adjust tether length after each stage.