How to Safely Lift a Large Dog Into a Car — 5 Easy Steps
Last Updated on October 29, 2025
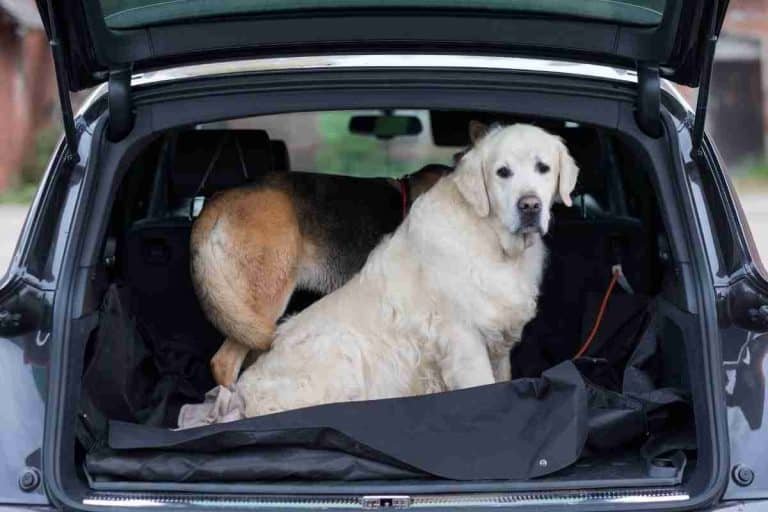
Safe car loading for big breeds is achievable. This guide shows how to safely lift a large dog into a car. These 5 easy steps protect joints and backs, reduce anxiety, and prevent slips.
It begins with readiness checks, then covers body mechanics, chest and hindquarter support, and secure restraints. Ramps, lifting harnesses, two-person coordination, and plans for seniors, injured, or anxious dogs appear alongside concise checklists and quick fixes.
Assess readiness before lifting
Before any physical lift, evaluate the situation deliberately. A short assessment reduces injury risk for both dog and handler. Start with a quick checklist that covers the dog, the vehicle and the handler’s capacity. Note the dog’s weight and temperament, and whether the dog reacts to confined spaces or sudden handling. Observe signs of stress, panting or reluctance to move. Check that the car door opens fully and that the vehicle park is level and secure. Plan the route from standing position to the seat and visualise hand placement and grip points. If the dog shows signs of severe anxiety, dizziness or pain, delay the lift and consult a veterinarian. When unsure about equipment choices, review consolidated gear and travel-readiness advice for road trips at essential dog travel tips and gear for road trips. Use a calm voice, steady movements and a clear command the dog already knows. Assign roles if another person will help. Place a non-slip mat near the car and clear clutter from the passenger area. These preparatory steps set the stage for a controlled, safe lift.
Check the dog’s health, mobility and current comfort level
Assess the dog’s mobility with simple, quick checks. Watch the dog walk a few steps to spot limping, stiffness or uneven gait. Ask the owner whether the dog has recent injuries, arthritis, surgery or chronic conditions. Feel along the spine, hips and legs for heat, swelling or areas the dog pulls away from. Test sit-to-stand: a smooth rise suggests usable strength; repeated struggle signals the need for assistance or lifting equipment. Note breathing rate and mucous membrane color; heavy panting, coughing or pale gums require veterinary attention before travel. Evaluate the dog’s mental state. A relaxed, tail-wagging dog tolerates handling better than one that growls, freezes or tries to escape. For travel-related anxiety and calming strategies to improve comfort during transport, see 9 natural ways to remedy your dog’s travel anxiety. If pain or instability appears, prioritize a safer transport option such as a ramp, carrier or professional assistance.
Inspect car access, seat height and landing surface
Measure the vehicle entry and landing zone before attempting a lift. Check the seat height relative to the dog’s shoulder; high SUV seats or low sports-car seats each present distinct risks. Ensure the door opening gives enough room for a controlled approach and exit. Examine the landing surface inside the car—use a non-slip seat cover or rubber mat to prevent sliding once inside. Outside the vehicle, clear loose gravel, icy spots or uneven ground that could sabotage footing during the lift. If the back of the vehicle has a steep step, consider using a ramp or portable steps. Secure the vehicle in park with the handbrake engaged and put the engine off while handling the dog. If transporting a crate, verify that it fits and can sit flush with the seat or cargo floor; for tips on anchoring crates and preparing the car interior, consult how to secure a dog crate in car. A solid, slip-resistant landing reduces sudden movements that can injure the dog.
Decide whether you need a second person or equipment
Weigh the dog’s weight and condition against the handler’s strength and lifting technique. A second person prevents awkward twists and off-balance lifts for dogs over 50 pounds or those with limited mobility. Choose equipment that matches the dog’s needs: a lifting harness with handle, a folding ramp, portable steps or a sling. A harness that supports chest and hindquarters distributes weight safely. Avoid lifting by collars or limbs. When using a ramp or steps, train the dog to walk up with treats and short practice sessions before relying on them. If the handler has back issues, use a belt or ask for help rather than risking improper form. For gear reviews and crate options suitable for car travel, see best dog crates for car travel in 2023. If doubt remains about lifting safely, book assistance from a second person or professional handler. CTA: assemble required equipment and rehearse the lift once, then proceed only when everyone stays calm and coordinated.
The 5-step safe lift method
This sequence breaks the lift into controlled actions. Each step focuses on body mechanics, dog comfort, and safety for both handler and animal.
Step 1 — Position yourself and give a clear cue
Stand so the dog faces you with feet shoulder-width apart. Keep a short, loose leash to prevent sudden lunges. Use a single, clear verbal cue such as up or lift, paired with a calm hand motion. Pause after the cue to let the dog prepare. Avoid sudden jerks or reaching over the dog’s head; that can startle a large dog and shift weight unpredictably. If the dog resists, use low-value treats or a favorite toy as a prompt rather than force. For dogs that routinely balk at entering vehicles, consult behavioral advice targeted at this issue for step-by-step desensitization and training tips: Dog refusing to get into car. Keeping the cue consistent trains the dog to brace and lean in, which makes the lift smoother and safer.
Step 2 — Secure firm chest support without squeezing
Slide one arm under the chest behind the front legs, with the forearm along the ribcage. Do not encircle the chest tightly; a firm cradle prevents compression of the lungs and avoids triggering discomfort. Keep fingers together and flat to distribute pressure. If the dog wears a well-fitted harness, hook the arm around the harness girth rather than grabbing fur. For dogs with short legs, place the hand beneath the sternum so the dog can rest weight against the forearm. Use a folded towel between hand and fur for extra grip on slippery coats. Keep the elbow close to the handler’s body to reduce strain. If uncertain about harness fit or restraint options, review practical vehicle-secure methods to pair safe lifting with secure travel: How to secure a dog in car with leash.
Step 3 — Scoop and support the hindquarters keeping the spine level
Place the other arm under the dog’s hindquarters, ideally under the pelvis or just behind the hips. Scoop upward so the pelvis and chest share the dog’s weight evenly. Aim to keep the dog’s spine horizontal; avoid angling the pelvis up while the chest drops. For heavy dogs, slide a folded blanket beneath the belly first, then pull the blanket toward the body to create a sling effect. If the dog shows pain or cannot bear weight on a limb, stop and consult a veterinarian rather than lift improperly. When two handlers are available, coordinate a simultaneous lift: one handles chest, the other the hips, then stand together. For additional gear ideas that reduce strain and protect the dog’s spine, see recommended travel aids: Essential dog travel tips and gear for road trips.
Step 4 — Stand using leg power and hold the dog close to your chest
Begin the rise by driving through the legs, not the back. Keep the back neutral and the core engaged. Rise in a single, smooth motion while drawing the dog tight to the chest. Holding the dog close reduces leverage and the feeling of falling forward. Keep the dog’s head to one side so it cannot whip during the move. Use the stronger leg to pivot toward the car; small steps are better than big turns. If a handler experiences lower-back pain when lifting, use a step stool or an angled ramp to reduce required vertical lift. Calming the dog before and during the stand helps minimize squirming and reduces injury risk; for natural calming strategies and travel-anxiety tips, consult: 9 natural ways to remedy your dog’s travel anxiety.
Step 5 — Gently place the dog in the car and fasten restraint or harness
Approach the open vehicle with the dog held close and level. Lower the hind end onto the seat first while supporting the chest, then ease the chest down so the spine stays straight. Allow the dog to orient on the seat before releasing. Immediately attach a travel harness or secure the leash to a seatbelt anchor. If using a crate, slide the dog in rear-first and secure the crate using recommended tie-downs or the vehicle’s anchor points. Check that the harness doesn’t ride up into the throat and that buckles lock. Close the door slowly to avoid startling the dog. For practical restraint and crate-securing techniques, review methods to keep carriers anchored and animals safe: 5 ways to secure a dog crate in car. Always verify harness fit before driving; a quick pre-trip safety check prevents unsafe shifts during travel.
Two-person lifts and coordinating with a helper
Before attempting a two-person lift, the lifters must pause and make a quick plan. Confirm the dog can breathe freely, remove collars that might twist, and fit a strong harness with a handle. Position the vehicle: park on level ground, open the door wide, and lower or fold seats if possible. Place a non-slip mat or blanket on the seat to prevent sliding after the lift.
The lead lifter approaches the dog from the side nearest the car. The second lifter stands behind the dog to control the rear. Both check footing and agree on the route into the vehicle. Use short rehearsals with a calm, light-weight object to build rhythm before lifting the dog.
Use gentle praise and food rewards to keep the dog calm. If the dog shows fear or pain, stop and reassess. For more general travel preparation and gear that eases loading, consult these essential dog travel tips and gear for road trips.
Assigned roles and proper hand placement for each lifter
Assign clear roles: the front lifter supports the dog’s chest and shoulders. The rear lifter supports the hindquarters and hips. For deep-chested breeds, the front lifter places a forearm under the chest, around the ribcage, and cups the sternum. For heavy hips, the rear lifter slides hands under the pelvis and lifts with the legs, not the back.
When a harness fits, place hands at the harness handle and under the belly. If the dog resists, use a folded blanket or towel as a sling. Slide the sling under the dog from both sides so each lifter can grasp one edge. Avoid lifting solely by the collar, belly skin, or limbs. Those points can injure the dog.
Wear snug shoes and communicate which hand holds the neck area. If space is tight, the rear lifter should step into the vehicle first and pull the dog in while the front lifter pushes gently. For tips on keeping the dog secure during the ride after loading, see how to secure a dog in car with leash.
Counting, synchronized movement and clear verbal commands
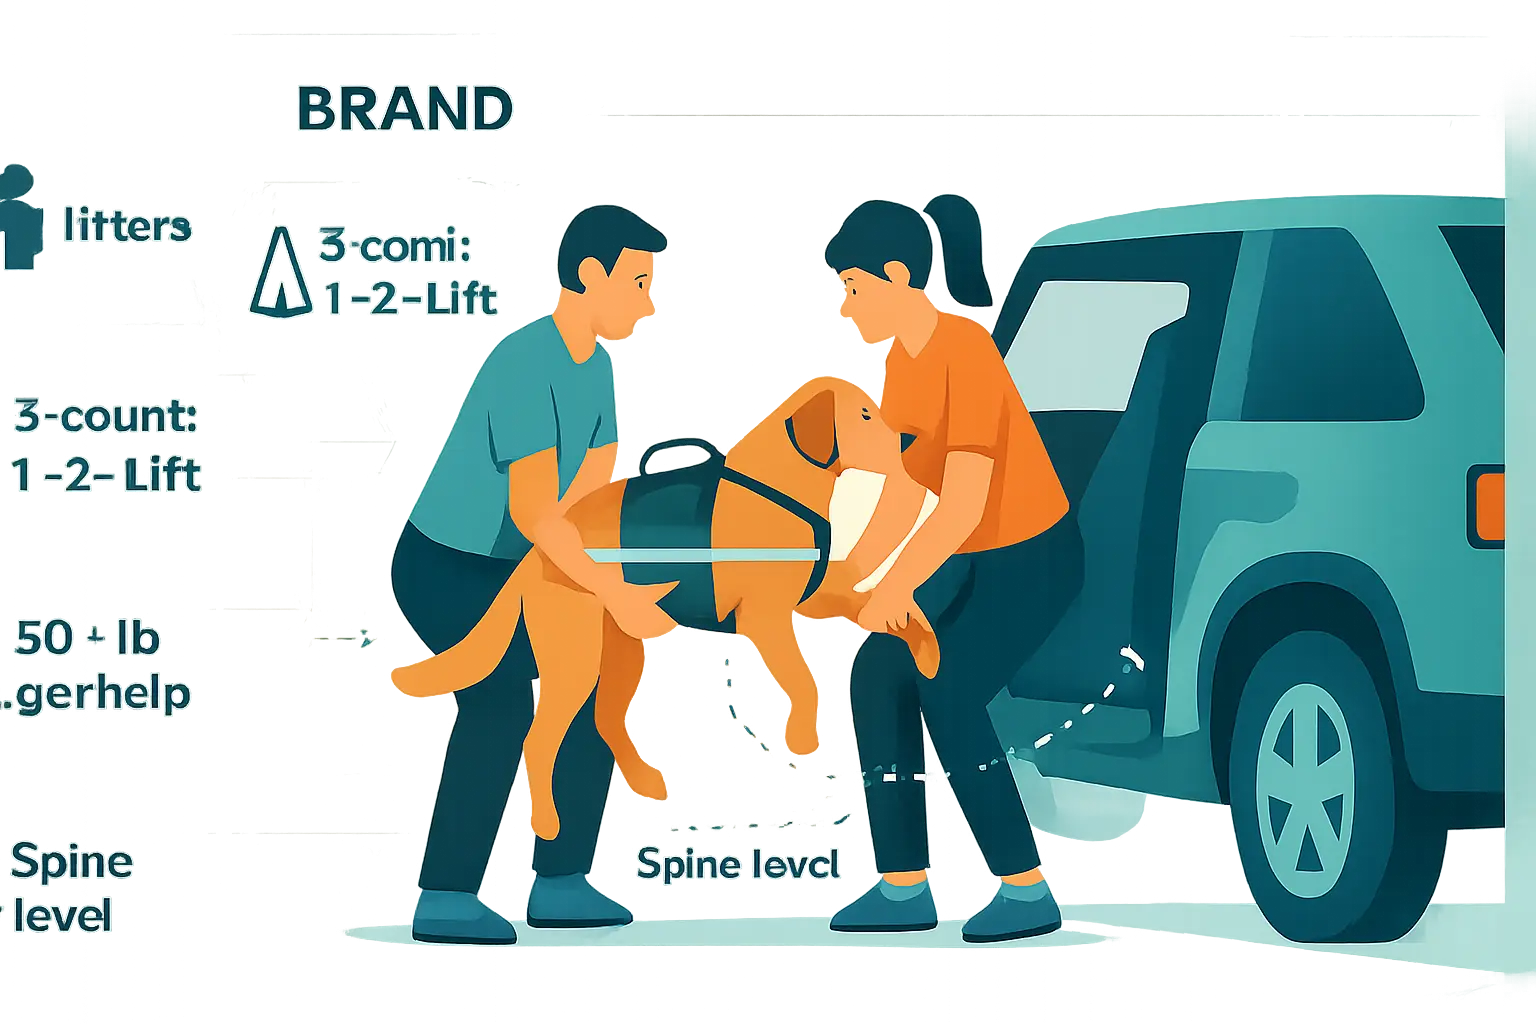
Agree on a simple count to synchronize effort. Use a slow three-count: “One… Two… Lift.” Speak each beat aloud. Both lifters inhale, bend at the knees, brace their core, and lift on the final count. Keep the dog’s spine level and close to the lifters’ bodies. Move in a single smooth motion to the vehicle seat.
Use consistent verbal cues so the dog understands what happens next. Short commands such as “easy,” “up,” or “wait” reduce surprise. Ask the dog to hold a sit or place paw on the seat when possible. Pause mid-move if the dog tenses; reset on the next count.
If the dog struggles, stop immediately and use a calming cue. Two-person lifts require calm, steady voices and no sudden jerks. For handling dogs reluctant to enter cars or who resist commands, consult the guidance in dog refusing to get into car.
Techniques for very large, heavy or immobile dogs
For dogs over typical lifter capacity, favor mechanical aids. Use a sturdy ramp or a pet ramp with a low angle when possible. A lifting sling or commercial harness with a handle distributes weight and protects the spine. Place a rigid board or stretcher beneath an immobile dog to create a stable platform for two lifters.
If two lifters cannot safely lift, add a third person or use lifting straps designed for large dogs. Slide straps under the dog in a figure-eight to support chest and pelvis, then tighten slightly before lifting. When a dog cannot assist at all, roll them gently onto a blanket and lift with synchronized counts, maintaining a flat back.
Always check for pain, recent surgery, or fractures before manual lifting. When in doubt, seek professional help from a veterinarian or animal ambulance service. For securing a heavy dog safely once in the vehicle, review methods for the cargo area at how to secure a dog in the cargo area of SUV. Practice these techniques with a helper before travel to reduce stress on dog and lifters.
Equipment and vehicle modifications that reduce lifting
When preparing to follow How to Safely Lift a Large Dog Into a Car — 5 Easy Steps, prioritize equipment and vehicle changes that lower or eliminate manual lifting. Lowering the vehicle entry height, adding a permanent ramp or a folding step, and installing non-slip flooring inside the cargo area reduce strain on both dog and handler. Reinforce the vehicle’s threshold with a durable bumper protector to limit slipping and protect paint. Add grab handles at hip height near the door to help the handler stabilize while guiding the dog.
Choose gear rated for the dog’s weight and body type. Wider ramps with gentle incline require less effort than steep narrow ramps. Folding stairs with non-slip treads offer steady footing and fit smaller trunks. Consider modifying the cargo floor to remove obstructions and create a flat, continuous surface for easier transfers.
For a checklist of travel gear and vehicle adjustments that make loading safer, consult this practical guide to essential dog travel tips and gear for road trips. Testing modifications with the dog at home before outings ensures familiarity and reveals any fit issues.
Choosing and fitting a lifting harness, sling or lifting strap
Selecting the right lifting aid begins with the dog’s size, weight distribution and medical needs. A full-body lifting harness distributes weight across chest and hips. A rear-support sling helps dogs with hind-leg weakness. Lifting straps that wrap under the chest and flank offer brief support for short transfers. Verify the product’s weight rating and choose materials that won’t chafe fur or skin.
Fit the harness before attempting a lift. The handler should adjust straps so the harness sits snugly but not tight; two fingers should slide between harness and dog at contact points. Position handles over the dog’s center of balance: mid-chest for forward lifts, just behind the ribcage for rear support. Use two handlers when the dog exceeds comfortable single-person lift weight.
Practice short, low lifts on level ground while the dog wears the harness. Pair the harness with a leash or short lead looped through a secure handle to steady the dog while approaching the car. For guidance on restraint and fit principles, review this article on how to secure a dog in car with leash.
Portable ramps, stairs and non-slip mats — selection and placement
Choose portable ramps and stairs with a gradual incline and a surface that grips wet paws. Look for ramps constructed from lightweight aluminum or reinforced polymer; they should lock in open position and fold compactly for storage. Measure the cargo height before purchase and calculate the ramp length that keeps the slope under 20 degrees for easier climbs.
Place the ramp or stairs on a flat, level surface and secure the top to the vehicle using included hooks or straps. If the ramp slides, add an anchor strap or a sandbag at the base. Position non-slip mats inside the vehicle where paws will land, extending matting from the threshold into the cargo area to prevent the dog from stopping at the lip.
Train the dog to use the ramp gradually: reward small progress, keep sessions short, and block off side areas so the dog faces forward. For tips on arranging ramps and securing the dog in vehicle cargo areas, see this post on how to secure a dog in the cargo area of SUV.
Crates, booster seats and car restraints to secure the dog after placement
Select containment that matches the dog’s size, behavior and trip length. Rigid crates with steel frames provide maximum protection for long journeys and can bolt to the vehicle bed or be anchored with cargo straps. Soft-sided crates work for calmer dogs on short drives. Booster seats suit dogs that need elevation to see out windows but require secure harness attachment points.
Match crate dimensions so the dog can stand, turn and lie down comfortably. Use crate tie-down kits or vehicle-specific anchors to prevent forward movement during sudden stops. For dogs that travel loose after lifting, employ a crash-tested car harness that connects to the vehicle’s seat belt system. Avoid tethering to a single point that allows the dog to be thrown forward.
Before travel, secure the crate or restraint and test it with bodyweight pressure. For product comparisons and installation tips, consult this review of the best dog crates for car travel in 2023. Consider a short trial drive to confirm comfort and restraint stability before a longer trip.
Protect your body — proper mechanics for handlers

Handlers must prioritize body mechanics before attempting to lift a large dog. Start by assessing the dog’s temperament and readiness. Position the vehicle to minimize the lift height when possible. Stand close to the dog with feet hip-width apart to create a stable base. Keep the spine neutral and hinge at the hips rather than rounding the back. Bend at the knees so the major force comes from the legs. Hold the dog close to the chest to reduce leverage and strain on the lower back. Use a harness with a sturdy handle to improve grip and control. If the dog resists, pause; forcing a lift increases injury risk.
When lifting, breathe out on the effort and coordinate with any helper. Use slow, controlled movements; avoid jerks and twists. Consider mechanical aids — ramps, folding steps, or slings — for repeated lifts or heavy dogs. Handlers who frequently transport pets should add leg- and core-strength exercises to their routine to build resilience. For gear and travel-specific recommendations that reduce overall handling strain, see Essential dog travel tips and gear for road trips. Practice the technique on a calm, cooperative dog before a long trip.
How to bend, brace and use your legs instead of your back
Adopt a squat-focused lift rather than bending at the waist. Stand with toes slightly outward and feet shoulder-width apart. Cue the dog to sit or stand steady. Squat by pushing the hips back and keeping the chest upright. Slide one forearm under the dog’s chest, near the sternum, and the other under the rear thighs or pelvis. Keep the dog close to the torso; close proximity reduces torque and lowers spinal loading.
Brace the core by drawing the belly slightly inward before lifting. Initiate the lift by extending the hips and knees together. Exhale during the upward motion to stabilize the torso. Avoid twisting; turn the whole body by moving the feet if direction changes are required. If the dog is anxious, use a two-person lift: one person supports the front, the other the hindquarters. For lifts involving crates, follow secure-handling tips like those in 5 ways to secure a dog crate in car to protect both dog and handler. Practice with light weights to ingrain the pattern before lifting a heavy dog.
Recognizing personal weight limits and when to stop
Handlers must honestly assess physical limits before attempting a lift. A practical rule: if the dog feels awkward to hold close, or if the dog’s weight approaches half the handler’s body weight, seek help or use equipment. Watch for warning signs during a lift: sudden sharp back pain, inability to control the dog, trembling legs, or breathlessness. Any of these signs mean stop immediately.
Consider age, recent injuries, and fitness level when deciding whether to lift. Pregnant handlers, those with chronic back issues, or anyone recovering from injury should avoid manual lifts. Substitute with a ramp, step, or two-person lift. If unsure about safe limits, consult a physical therapist or the dog’s veterinarian for tailored guidance. For context on size and travel classifications that often affect handling choices, review Airlines that allow large dogs in cabin, which discusses size thresholds and handling considerations that translate to car travel decisions.
Tips for reducing strain when lifting on uneven ground or slippery surfaces
Uneven or slippery surfaces raise the risk of slips and injury. Before lifting, move the dog onto the most stable ground available. If possible, load the dog from a low, level surface such as a curb or lowered tailgate. Wear shoes with good traction and avoid wet or icy patches. Position one foot forward and one back to form a staggered stance that resists sliding.
If ground stability remains poor, lower to a half-kneel and lift the dog onto the lap or knees first. From that position, rise using the legs and place the dog into the car. Use a short, secure leash or harness handle as an anchor, but never rely solely on a leash to bear the dog’s weight. Consider portable non-slip mats or folding ramps to create a safer foothold. After loading, immediately secure the dog so it can’t shift and destabilize the handler. For advice on stabilizing dogs inside vehicles after loading, see How to secure a dog in the cargo area of SUV. A controlled, deliberate approach reduces strain and keeps both handler and dog safe.
Teach and practice so lifting becomes low-stress
Teaching a dog to accept being lifted reduces strain for both handler and pet. Break the task into small, repeatable steps. Use short, consistent sessions and reward calm behavior. Practice on neutral ground before attempting the car. Gradual repetition builds confidence and removes surprise during real lifts.
Training a simple “up” cue and reinforcing with treats
Teach a clear verbal cue such as “up” paired with a hand signal. Use high-value treats and mark the exact moment the dog moves into position. Reward immediately and reduce food slowly as the dog learns. Keep training sessions under a minute and end while the dog remains eager. For broader travel preparation tips and useful gear to support practice, see Essential dog travel tips and gear for road trips.
Progressive practice: table → low platform → car
Progress from a stable, waist-height surface to a low platform, then to the car. Start with the dog stepping up voluntarily. Gradually add partial support with two hands under chest and rear. Only move to the next stage when the dog offers calm, repeatable behavior three to five times. Secure the car door and use a non-slip ramp or platform when possible. For ways to keep a dog secure during vehicle loading, consult How to secure a dog in car with leash.
Exercises to help anxious or wriggly dogs accept being lifted
Use short desensitization drills: touch sessions, brief cradling, and lifting one end at a time. Pair each touch and lift with a soft voice and treats. Teach the dog to settle on command with a mat or blanket in the car. If motion anxiety or stress persists, try calming strategies from 9 natural ways to remedy your dog’s travel anxiety. Aim for five-minute daily practices and monitor progress — small, consistent gains make lifts low-stress.
Special situations: injured, elderly or reactive dogs

When a dog is injured, elderly or reactive, lifting requires extra planning and slower, safer movements. Assess the dog’s condition before any lift. Look for breathing trouble, visible fractures, or signs of shock. For elderly dogs, check mobility and joint pain. For reactive dogs, evaluate stress cues and distance from triggers. Use a two-person method whenever possible. One person supports the chest and front legs while the other supports the hindquarters and hips. Keep the dog’s spine aligned and move in a single, steady motion.
Prepare the car before lifting. Lower the tailgate or open the rear door wide. Place a non-slip mat or folded blanket where the dog will sit. If the dog resists entry, use reward-based coaxing to reduce panic. For dogs that outright refuse to enter, follow step-by-step guidance on handling reluctance from resources like dog refusing to get into car. That guide offers practical calming and training tips to reduce stress during transport.
Use simple aids such as ramps or sturdy boards when possible. Ramps reduce strain on hips and backs. If a ramp isn’t available, plan a safe two-person lift and keep communication clear between handlers. When in doubt, call for professional assistance.
Using towels or blankets as improvised stretchers and support slings
Towels and blankets provide immediate, low-cost support for lifting a large dog. Fold a heavy towel or blanket into a flat, wide panel. Slide it gently under the dog while keeping the spine as straight as possible. For dogs that can bear some weight, create a sling by folding the fabric lengthwise and placing it under the belly, from chest to pelvis. Lift with hips and knees, not the back, and coordinate timing between two handlers.
For an improvised stretcher, use two strong, identical blankets or towels. Place them side by side beneath the dog and roll the edges over to create firm handles. Lift together, keeping the load close to the body. Avoid twisting motions. If the dog’s neck or back may be injured, avoid sliding the dog; instead, lift on a rigid surface, if available, or call for help.
Store a compact emergency blanket and a long towel in the car for trips. For guidance on securing animals in vehicles and alternatives to crates, see the tips in how to transport a puppy in a car without a crate. Practice the sling and stretcher technique calmly before an emergency.
When to call a vet, professional handler or use specialized transport
Recognize red flags that require professional help. Call a vet or emergency clinic when the dog shows labored breathing, uncontrolled bleeding, pale gums, collapse, seizures, or suspected spinal injury. Severe limping, exposed bone, or extreme pain also warrant immediate veterinary attention. If the dog is pregnant, consult a vet before any travel; complications demand trained transport advice. See guidance on traveling with pregnant dogs at can a pregnant dog travel by car.
Use a professional handler or specialized pet transport for large, aggressive, or medically fragile dogs. Pet ambulances and trained animal control teams have proper lifting equipment, splints and sedation protocols. If a handler is unavailable, call the vet clinic for specific instructions. Describe symptoms and follow triage steps exactly.
Before pros arrive, stabilize the dog: keep it warm, stop visible bleeding with pressure, and avoid unnecessary movement. Keep the dog calm with soft voice cues and minimal handling. Have the dog’s medical records and contact numbers ready for any transport service.
Safety protocols for dogs that may bite: muzzles, sedation advice and handling precautions
When a dog may bite, prioritize human and canine safety. Use a well-fitted basket or nylon muzzle rather than makeshift coverings. Introduce a muzzle ahead of time if possible so the dog tolerates it during stress. For reactive dogs, short, calm training sessions can help the dog accept the muzzle as a normal item.
Avoid sedating a dog without veterinary guidance. Sedatives can affect breathing and mobility and complicate emergency care. If sedation seems necessary, only a veterinarian should prescribe and administer it. Discuss options such as mild, clinic-administered anxiolytics when planning transport for reactive dogs.
Additional handling precautions include wearing protective gloves and long sleeves, using a slip lead to control the head, and limiting the number of people near the dog. When possible, use crates or rigid carriers to separate handlers from a stressed dog during loading. For non-pharmaceutical strategies to reduce travel anxiety, consider evidence-based options described in 9 natural ways to remedy your dog’s travel anxiety. Always consult a veterinarian about muzzling and sedation decisions.
Compact checklist and troubleshooting
For the How to Safely Lift a Large Dog Into a Car — 5 Easy Steps routine, use a tight pre-lift checklist and fast troubleshooting tips to reduce risk and save time.
Pre-lift rapid checklist (dog, handler, vehicle, equipment, plan)
Dog: confirm the dog is calm, dry, and not injured. Check collar, harness fit, and behavior cues.
Handler: test grip strength briefly and warm up the hands. Wear non-slip shoes and a back-support belt if needed.
Vehicle: open the door wide, lower seats or add a ramp/step, clear clutter from the floor and seat.
Equipment: have a properly rated harness or lifting sling, a non-slip mat, and a towel for extra grip.
Plan: assign roles if a second person helps. Pick the lifting side and set a verbal count (e.g., “1–2–lift”).
Quick fixes for common problems (slipping, squirming, handler pain)
Slipping: place a rubber mat or folded towel under the dog’s paws. Reposition the harness so weight distributes under the chest and hips.
Squirming: pause, soothe with a calm voice, and try a high-value treat. If needed, wrap the dog gently in a towel to limit flailing.
Handler pain: shorten the lift by using a ramp or fold-out step. If lifting remains painful, swap roles or use a harness with lift handles.
Short FAQs: How heavy is too heavy? What if the dog panics during the lift?
How heavy is too heavy? If the handler cannot lift without rounding the back, the dog is too heavy for a safe one-person lift. Use mechanical aids, a ramp, or two people.
What if the dog panics during the lift? Stop immediately, create distance, and calm the dog. If refusal or panic repeats, follow guidance for dog refusing to get into car before attempting another lift.
Summary
How to Safely Lift a Large Dog Into a Car — 5 Easy Steps brings together preparation, proper body mechanics, and smart gear choices to reduce risk for both dog and handler. It starts with a rapid readiness check of the dog, the vehicle, and the handler’s capacity; then walks through a controlled five-step lift that keeps the spine level, uses leg power, and ends with immediate restraint for safe travel.
The guide also covers two-person coordination, equipment that minimizes lifting, and adjustments for injured, elderly, or reactive dogs. A compact checklist and troubleshooting tips help solve common issues like slipping, squirming, and handler strain so loading stays calm, efficient, and safe.
Key Takeaways
- Assess first: Check the dog’s mobility and stress signals, the vehicle’s access and landing surface, and the handler’s limits before any lift.
- Use help or gear when needed: For heavy or unstable dogs, add a second person or use a harness, ramp, steps, or a sling; never lift by the collar or limbs.
- Follow the 5-step method: Cue clearly, support the chest, scoop the hindquarters, rise with leg power while holding the dog close, then place gently and secure restraint immediately.
- Coordinate two-person lifts: Assign roles, agree on a slow count, keep the spine level, and move in one smooth, synchronized motion.
- Secure for travel: Use a crash-tested harness, anchored crate, or appropriate restraint; verify fit and tie-downs before driving.
- Know the red flags: Stop for signs of pain, panic, or medical issues and contact a veterinarian or professional transport if safety is uncertain.
FAQ
- What is the safest way to lift a large dog into a car?
Use a clear cue, support the chest and hindquarters, keep the spine level, stand with leg power while holding the dog close, then place gently and secure a restraint. Move slowly and avoid twisting. - How can someone tell if a second person or equipment is needed?
If the dog weighs over about 50 pounds, has limited mobility, or the handler cannot lift without rounding the back, add a helper or use a ramp, steps, or a lifting harness. - What should secure the dog after placement?
A crash-tested harness connected to the seat belt or an anchored, well-fitted crate. Check that straps sit on the chest, not the throat, and that all tie-downs are locked before driving. - Why keep the dog’s spine level during the lift?
A level spine distributes weight evenly and reduces strain on the neck, hips, and back, lowering the risk of injury or sudden struggling. - How should lifting change for injured, elderly, or reactive dogs?
Slow down, use two-person lifts or ramps, add a well-fitted harness or sling, and consider a muzzle if bite risk exists. Stop and call a veterinarian or professional transport for medical red flags.